
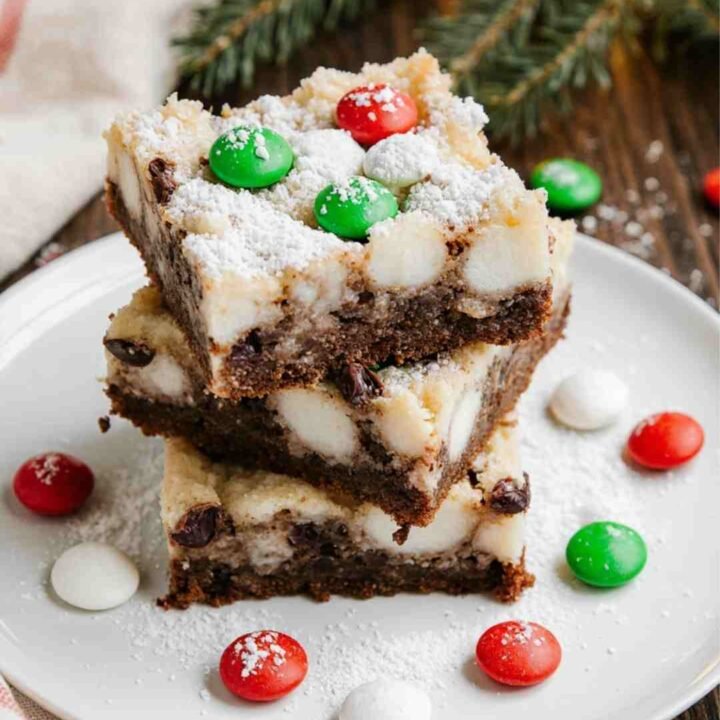
Santa’s Cookie Bars (Soft, Chewy & Festive!) | Easy Holiday Dessert
Okay, imagine this: Santa knocks on your door and instead of politely ringing the bell, he straight-up barges in because he smelled these cookie bars baking from the North Pole. Like, full urgency. Because yes — they’re that good.
Chewy, buttery, melty chocolate, gooey marshmallows, festive sprinkles… basically Christmas cheer baked into blondie-style cookie squares. And the best part? Not a single cookie scoop in sight. No rolling. No chilling. No “why is my dough sticking to everything like holiday stress?” vibes.
Just mix, spread, bake, slice — done. More time for hot chocolate, fuzzy socks, and judging Christmas lights in your neighborhood like a dedicated holiday critic.
Let’s bake Santa’s new obsession.
Before you begin, grab my Soft Christmas Sugar Cookies recipe too — because if we’re baking Christmas treats, we might as well go all in. ????
Why This Recipe is Awesome
You know those Pinterest recipes that look cute but taste like disappointment? Yeah, this isn’t that.
Why these bars slap harder than Christmas morning coffee:
- One bowl, no mixer — lazy baker approved
- Thick, chewy, bakery-quality texture
- Packed with chocolate chips, M&Ms & sprinkles
- A little gooey in the center (as all happy things are)
- Kid-friendly, adult-obsessed, Santa-endorsed
- Freezer-friendly so you can “meal prep happiness”
They also make your kitchen smell like Christmas joy hugged a butter factory. If that doesn’t convince you, I don’t know what will.
If you love cozy winter desserts, check out my Crockpot Turkey & Rice Soup — perfect after dessert-baking marathons.
Ingredients You’ll Need
Grab these simple, festive ingredients — your taste buds are about to do jingle bells.
Dry Ingredients
- 2 cups all-purpose flour
Standard flour magic. Don’t get fancy. - 1/2 teaspoon baking soda
Lifts the bars just enough — like holiday spirit. - 1/2 teaspoon salt
Trust me — it makes the sweet pop.
Wet Ingredients
- 1 cup melted butter (2 sticks)
Melted = chewier bars. We love chewy. - 1 cup brown sugar
The caramel-flavored MVP. - 1/2 cup granulated sugar
Sweetens without overpowering. - 2 large eggs (room temp)
They mix better and help the bars stay soft. - 2 teaspoons vanilla extract
Don’t measure this with fear — vanilla means love.
Fun Stuff
- 1 cup Christmas M&Ms
- 1 cup holiday chocolate chips
- 1 cup mini marshmallows
- Holiday sprinkles (aka edible confetti)
Optional but encouraged:
- White chocolate to drizzle
- Crushed candy canes for peppermint crunch
- A sprinkle of cinnamon if you want “warm cozy Christmas cabin” energy
Ingredient Notes:
Want bakery-style bars? Use fresh brown sugar — old dry sugar = sad bars.
Measure flour gently — over-packed flour = cookie sadness.
Holiday Baking Safety Tip: Planning to share these at a holiday party? Make sure your treats stay safe and delicious by checking these holiday food safety tips from FoodSafety.gov. ????✨
Step-By-Step Instructions
Grab your whisk, put on your Mariah Carey playlist, and let’s bake.
Prep the Magic
Preheat oven to 350°F (175°C).
Line a 9×13 baking pan with parchment.
Grease the edges like you’re bribing Santa — because you kinda are.
Mix Wet Ingredients
Melt butter and let it cool a bit — not scorching.
Whisk in brown sugar + white sugar until smooth and glossy.
Add eggs + vanilla and whisk again. Should look like caramel dreams.
Pro tip: If your butter is too hot, you’ll scramble the eggs.
Scrambled eggs do not belong in Santa’s bars. Ever.
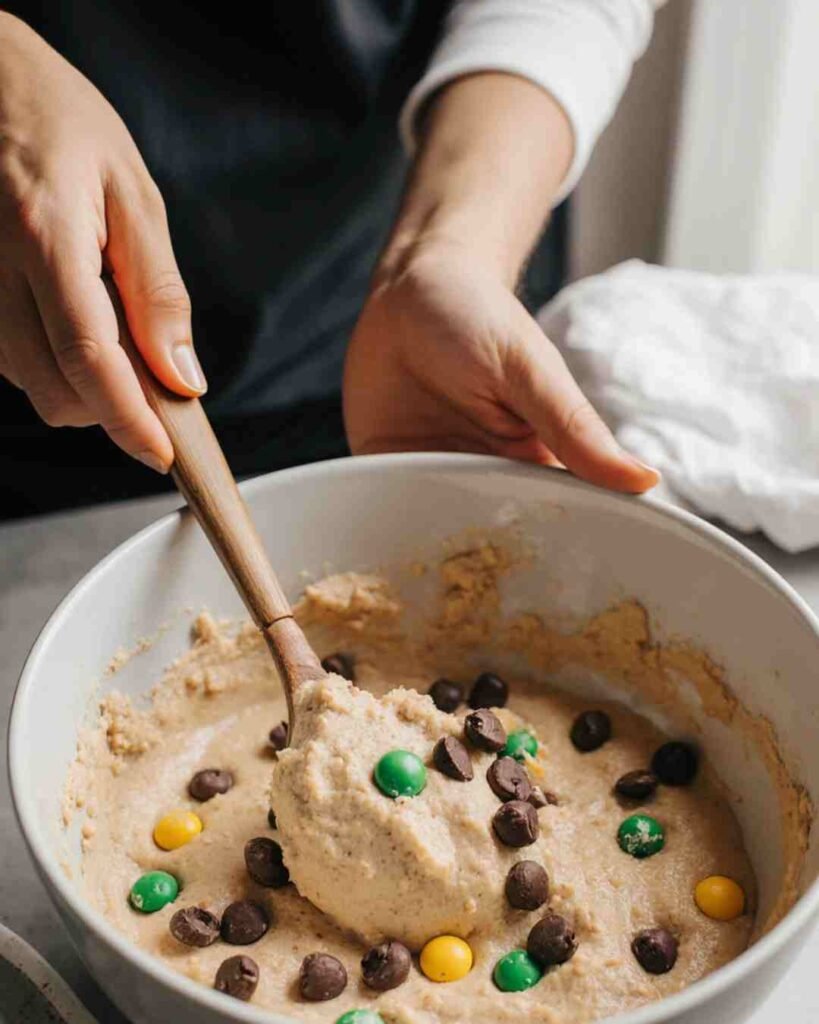
Fold In Dry Ingredients
Add flour, baking soda, and salt.
Stir gently — no overmixing or we enter the “dense cookie brick” zone.
The batter should be thick and happy.
Add Christmas Goodies
Fold in:
half the M&Ms
half the chocolate chips
half the marshmallows
Save the rest for the top — because presentation matters and Santa is judging.
Spread & Decorate
Press dough evenly into your pan.
Top with remaining candies + sprinkles.
Make it pretty — like holiday sweater energy but less itchy.
Bake
Bake 25–28 minutes, until edges are golden and the center looks set but soft.
If you poke the middle and it looks slightly gooey — perfect. It sets as it cools.
Cool & Slice
Let cool completely.
Not “10 minutes because I’m impatient” — I mean completely cool.
Slice into squares. Admire. Taste test. Taste test again… you deserve it.
Common Mistakes to Avoid
- Skipping parchment paper
You’ll regret it like Christmas shopping on December 24th. - Overbaking
Soft and chewy > dry and sad.
Pull them when edges brown and middle looks slightly underdone. - Overmixing the batter
You’re making cookie bars, not developing gluten for a sourdough marathon. - Cutting while hot
You’ll get cookie rubble. Delicious rubble, but still rubble. - Thinking marshmallows go in from minute 1
If you overmix them, they vanish. Ghost marshmallow energy = no thanks.
Alternatives & Substitutions
Feeling creative? Love it. Let’s tweak:
| Ingredient | Swap |
|---|---|
| Butter | Melted coconut oil (slightly different flavor) |
| Chocolate chips | White chocolate, peppermint chips, butterscotch |
| M&Ms | Chopped Hershey’s bars, sprinkles, crushed Oreos |
| Marshmallows | Toffee bits, caramel chips, pretzel chunks |
| All-purpose flour | 1:1 gluten-free blend |
Flavor upgrades:
- Add cinnamon + nutmeg = gingerbread vibes
- Add crushed candy canes = peppermint wonderland
- Drizzle white chocolate = dessert glam
My personal fave? White chocolate + crushed peppermint. Looks bougie. Tastes bakery-level. Costs $0 extra energy. Win.
FAQ
Can I make these ahead?
Yes! Store airtight up to 4 days or freeze 2 months. Future-you will thank you.
Do I need a mixer?
Nope. This is a whisk + bowl life. We don’t do holiday stress here.
Why aren’t my bars chewy?
Overmixed or overbaked. It happens. Eat them anyway and learn.
Can I halve the recipe?
Sure — but why? Regret is real.
Can I add nuts?
Absolutely. Toasted pecans = chef kiss.
Can dogs have these?
Nope. Chocolate = naughty list. Give them a Christmas dog treat instead.
Final Thoughts
You just baked the official treat of the North Pole (not confirmed by Santa’s legal team, but still).
These bars are festive, gooey, chewy, melty, and ridiculously easy — truly the holiday miracle we deserve.
Make them for parties.
Make them for gifting.
Make them at midnight because December is a personality, not a month. ✨
And hey — if someone asks where you got the recipe?
Just wink and say:
“Santa shared it. We bake together on Tuesdays.”
Happy baking & merry cookie season!
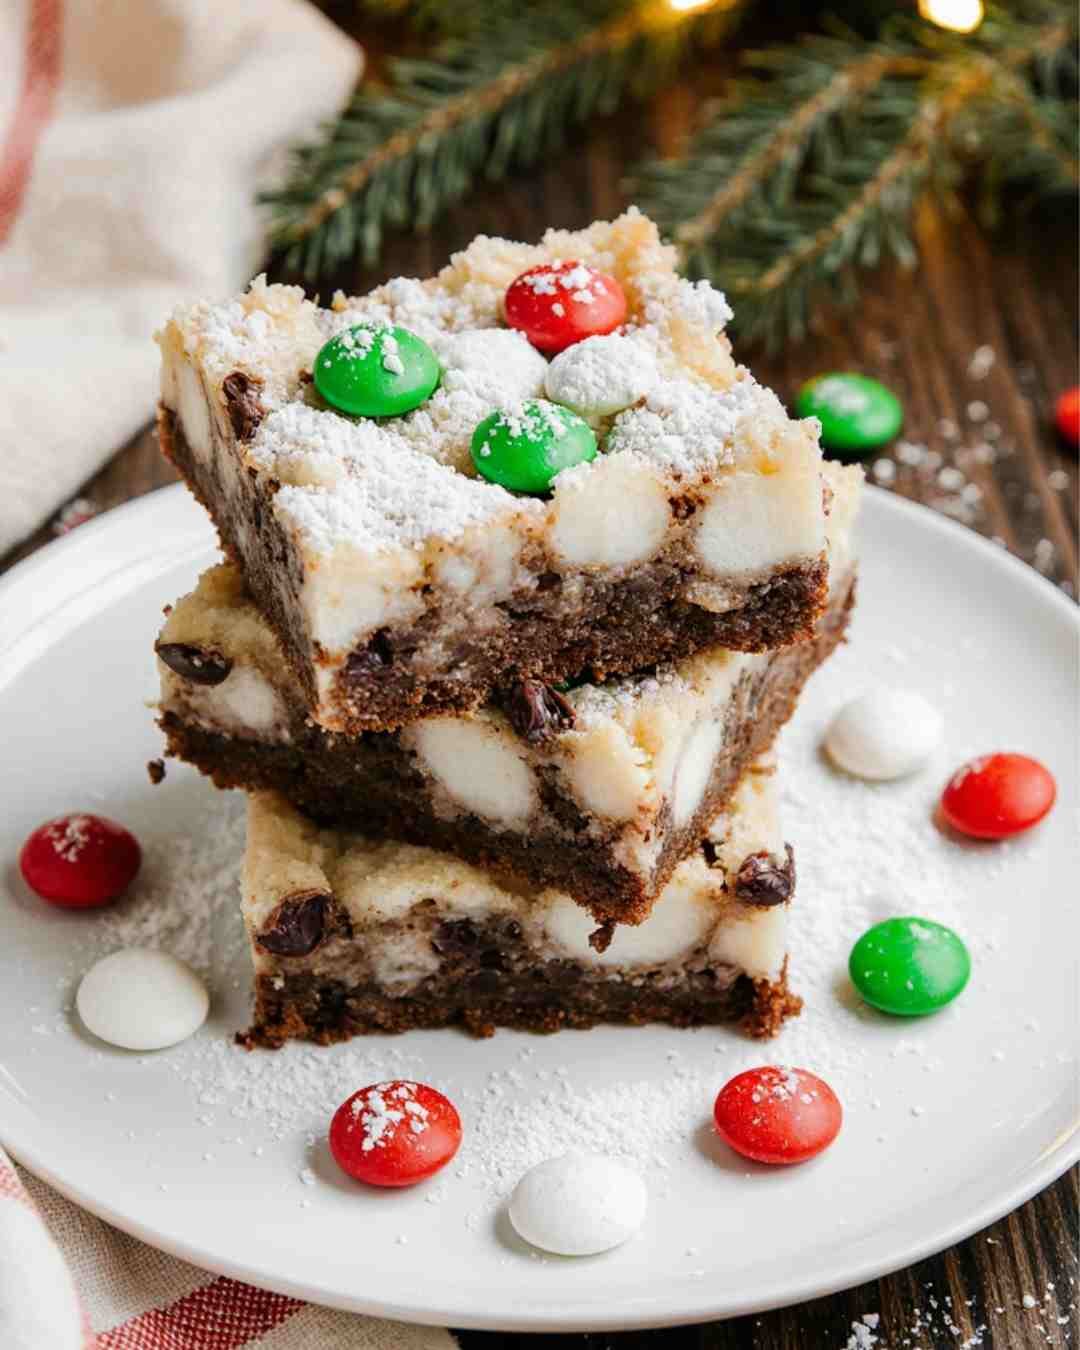
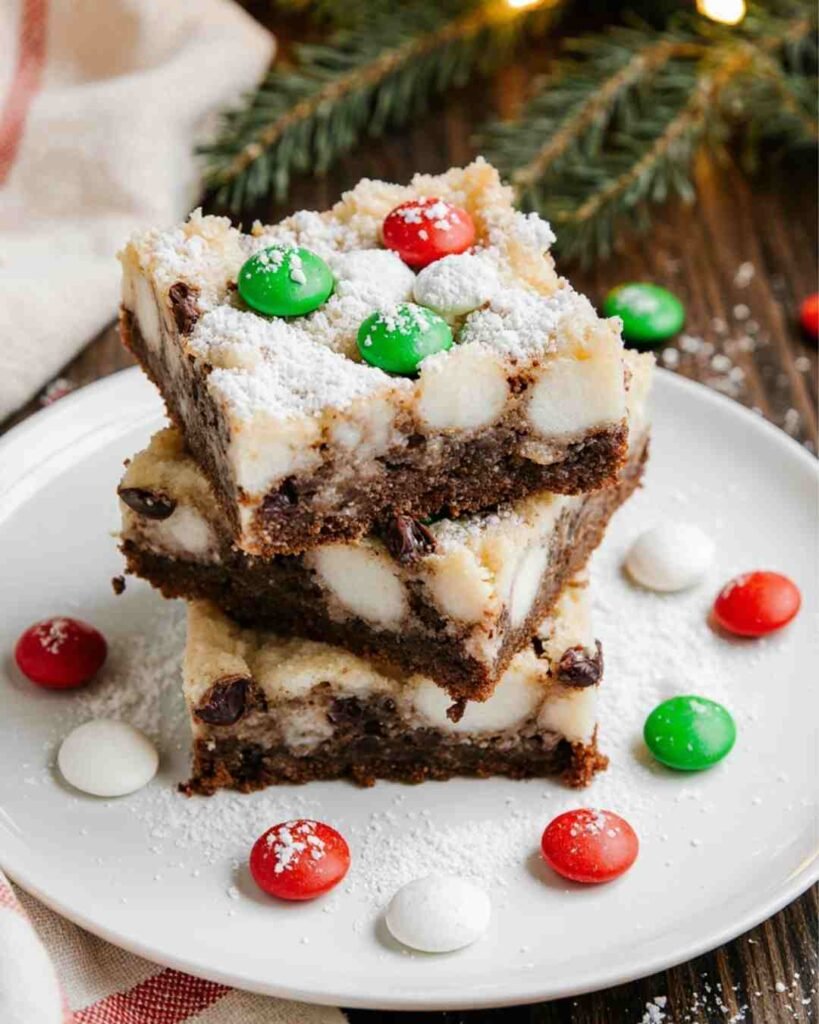
Santa’s Cookie Bars
These soft and chewy Santa’s Cookie Bars are loaded with chocolate chips, festive M&Ms, and gooey marshmallows — the ultimate easy Christmas dessert! No chilling, no cookie scooping, just mix, spread, bake, and slice. Perfect for holiday parties, cookie trays, and Christmas movie nights.
Ingredients
- 2 cups all-purpose flour
- ½ teaspoon baking soda
- ½ teaspoon salt
- 1 cup unsalted butter, melted and slightly cooled (2 sticks)
- 1 cup packed brown sugar
- ½ cup granulated sugar
- 2 large eggs, room temperature
- 2 teaspoons vanilla extract
- 1 cup holiday chocolate chips
- 1 cup red & green M&Ms
- 1 cup mini marshmallows
- Holiday sprinkles, to taste
- Optional: melted white chocolate for drizzling, crushed candy canes
Instructions
Notes
Nutrition Information:
Yield: 12 barsAmount Per Serving: Calories: 280Total Fat: 13gCarbohydrates: 39gFiber: 1gSugar: 25gProtein: 3g