
How to Make a Bakery-Perfect Red Velvet Oreo Cheesecake at Home
Red Velvet Oreo Cheesecake Recipe is the ultimate dessert mash-up — creamy, crunchy, and impossibly indulgent. Make this easy red velvet cheesecake with Oreo crust for the perfect show-stopping treat that looks fancy but bakes effortlessly.
If you’ve ever wanted to create something that makes people gasp at the dinner table and whisper, “Who made this?” — congratulations, you just found your signature dessert.
Grab your whisk, your sense of adventure, and maybe an extra sleeve of Oreos (for, uh, “testing purposes”). Let’s bake something that’ll make your oven proud
Why You’ll Totally Love This
Let’s be honest — cheesecake is already great. Red velvet is already great. Oreos? Iconic. Combine them, and you’ve basically achieved dessert enlightenment. Here’s why you’ll fall in love with this recipe:
- It’s indulgent but not complicated. The steps are easy, and you’ll feel like a baking genius when it comes out looking bakery-level perfect.
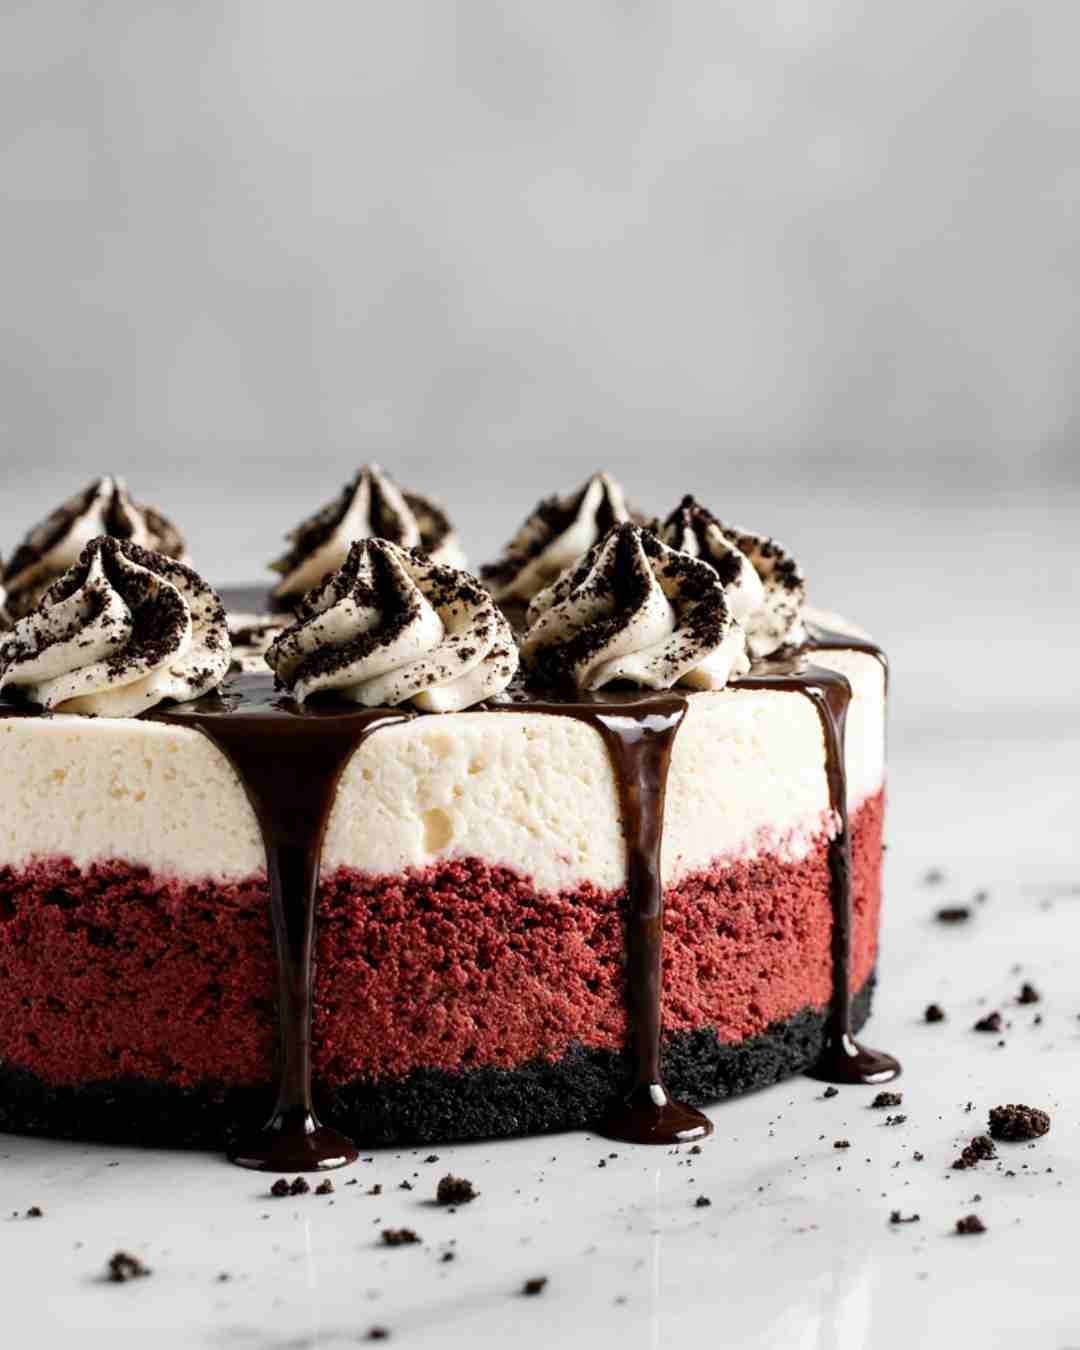
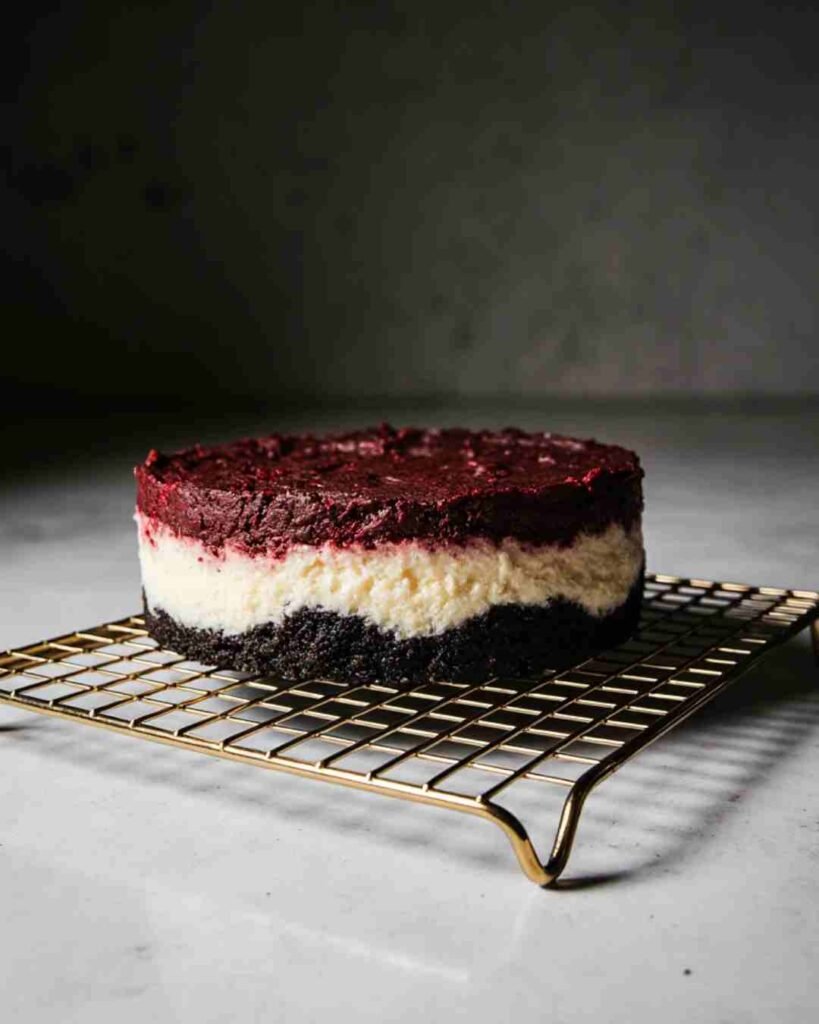
- It looks like a showstopper. That deep red filling against the black-and-white Oreo crust? Pinterest gold.
- It’s a textural masterpiece. Crunchy crust, velvety middle, fluffy topping — every bite has layers of joy.
- It’s surprisingly forgiving. A crack? Hide it with whipped cream. No one will ever know.
- It’s adaptable. Want to go gluten-free? Done. Want minis? Easy. This recipe gets you.
Basically, this cheesecake is like your fun friend who also has their life together — indulgent, reliable, and great in every situation.
What You’ll Find in This Cheesecake
Before we start making magic, here’s what this beauty includes:
- A crunchy Oreo crust that’s buttery, rich, and the perfect base.
- A silky red velvet cheesecake filling, dotted with Oreo chunks.
- Optional toppings — whipped cream, more Oreos, a drizzle of chocolate (because restraint is overrated).
- Storage tips, swaps, and the answers to all your “Wait, can I…” questions.
By the end, you’ll have a dessert that’s part art project, part love story, and entirely delicious.
Ingredients You’ll Need for This Red Velvet Oreo Cheesecake Recipe
For the Crust
- 24 Oreo cookies – Whole. Yes, the cream stays. We’re not savages.
- 5 tablespoons unsalted butter, melted – Because butter makes everything better.
For the Cheesecake Filling
- 3 packages (8 oz each) cream cheese, softened – Leave it out ahead of time. Cold cream cheese = arm workout.
- 1 cup granulated sugar – For that classic cheesecake sweetness.
- ¾ cup sour cream – Adds that tangy, rich flavor.
- ½ cup heavy cream – For ultimate creaminess.
- 1 teaspoon vanilla extract – Optional, but it adds balance.
- 2 tablespoons unsweetened cocoa powder – Red velvet’s signature hint of chocolate.
- 1 tablespoon red food coloring – Adjust to taste. Go drama-red or subtle crimson.
- 3 large eggs – The glue that holds it all together.
- 10 crushed Oreos – Folded into the filling for crunch and flavor explosions.
For the Topping (Optional but Highly Recommended)
- Whipped cream
- Mini Oreos or crumbs
- Chocolate drizzle (or ganache, if you’re fancy)
Step-by-Step Instructions for the Red Velvet Oreo Cheesecake Recipe
1. Fire Up the Oven
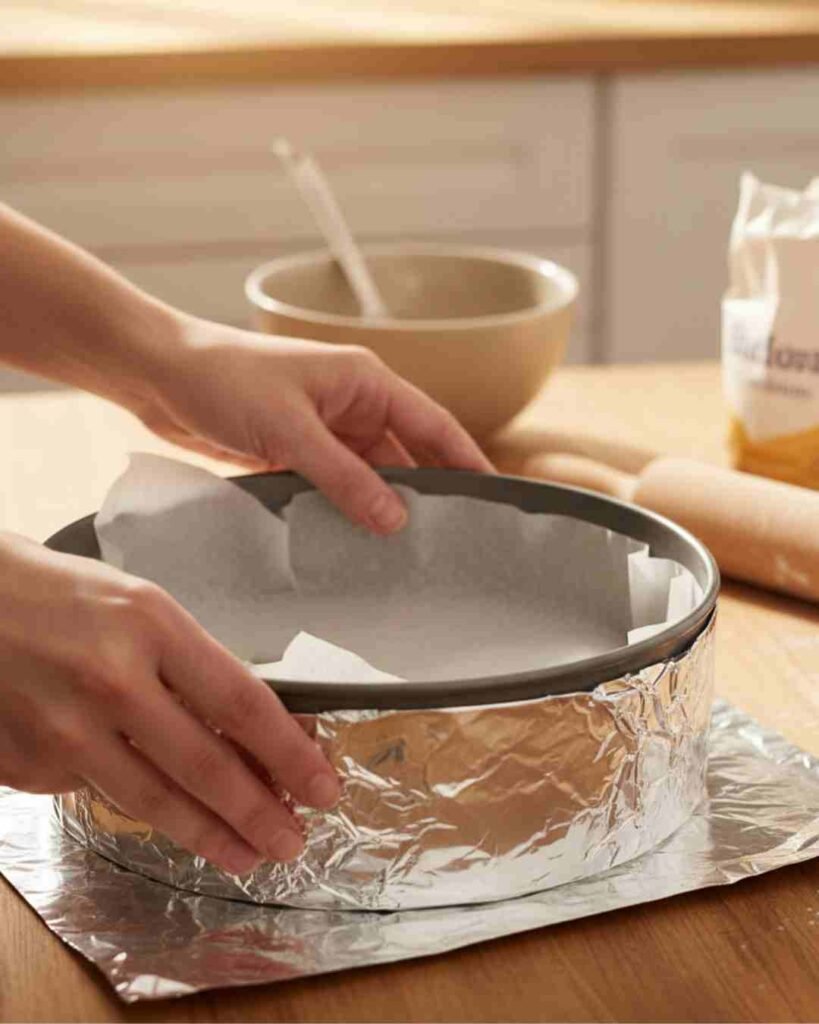
Preheat your oven to 325°F (160°C). Cheesecakes are divas about temperature, so don’t skip this. Line the bottom of a 9-inch springform pan with parchment paper, then wrap the outside in aluminum foil. Why? Because we’re doing a water bath later, and nobody wants soggy crust syndrome.
2. Make the Crust (and Resist Eating It)
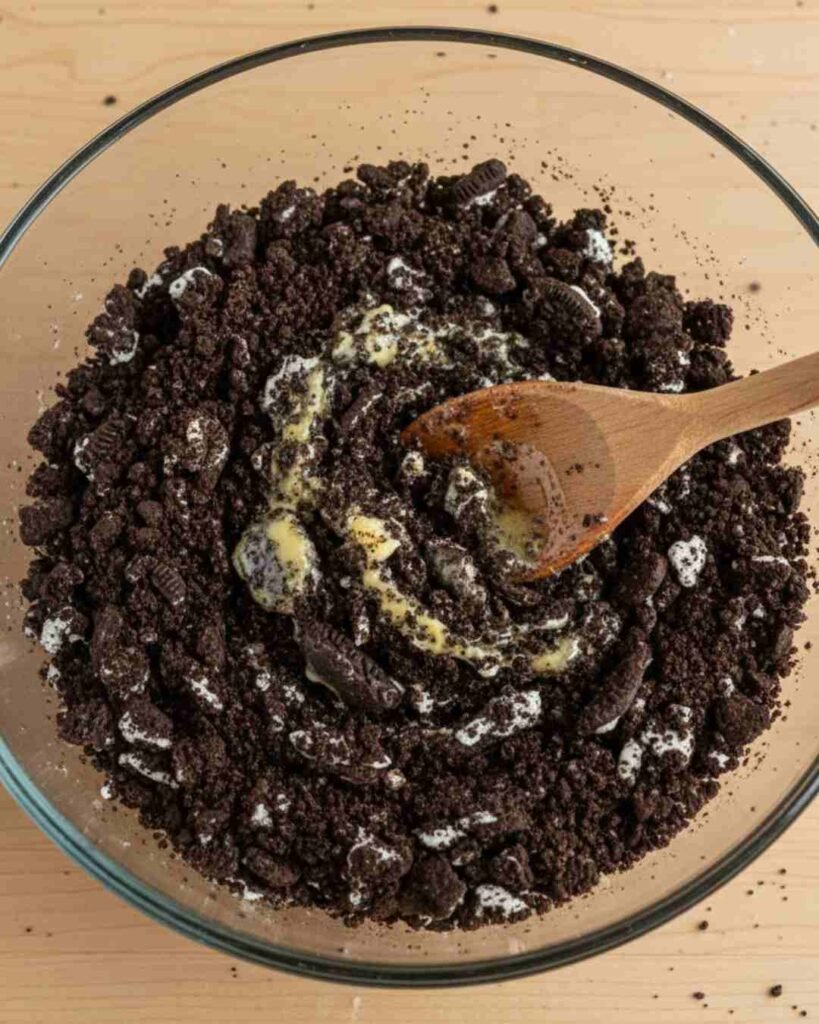
Crush 24 Oreos until they’re fine crumbs — food processor, blender, or aggressive rolling pin therapy all work. Mix with melted butter until it looks like damp sand. Press the mixture into your pan, going slightly up the sides if you like extra crunch.
Bake for 10 minutes, then cool. Take a deep breath. You just nailed step one.
3. Smooth Like Cream Cheese
In a big mixing bowl, beat cream cheese until smooth. (If it’s still cold, it’ll fight back. Don’t let it win.) Add sugar and vanilla, and keep mixing until fluffy. Scrape down the sides — every bit matters.
Pro tip: Use a stand mixer on medium speed. If you’re doing this by hand, prepare for an upper-body workout worthy of dessert glory.
4. Add the Tang
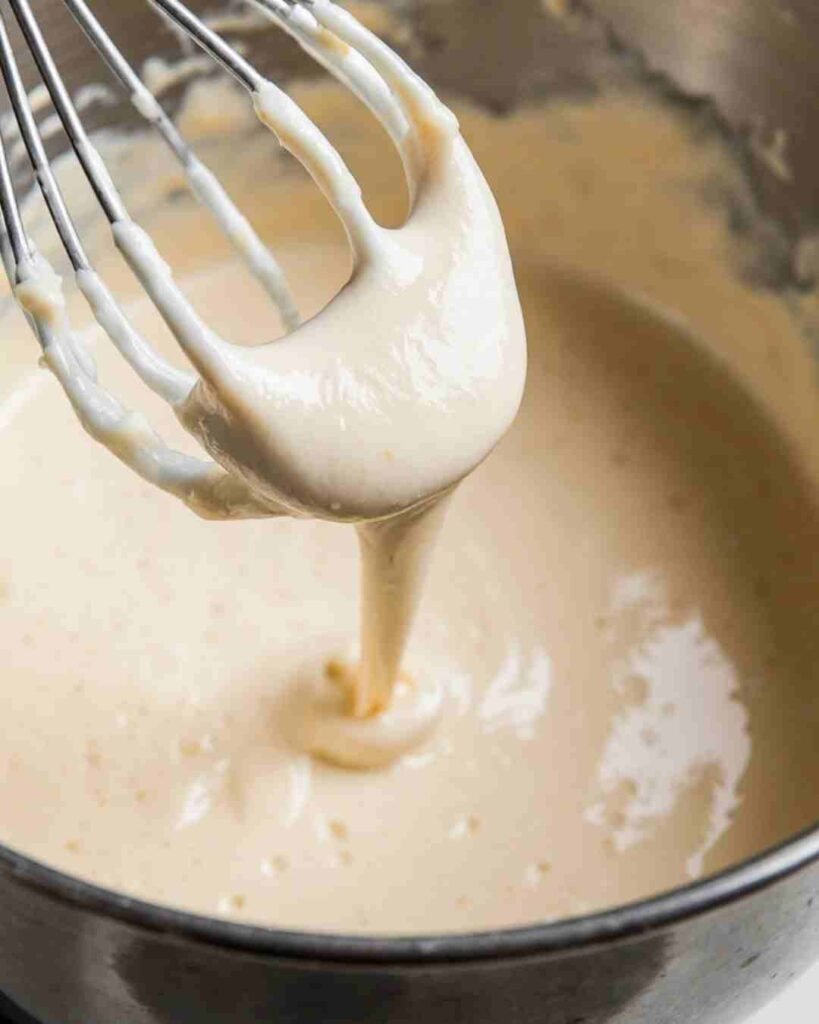
Mix in sour cream and heavy cream until your batter looks silky and glossy. You’re basically making edible velvet at this point. Don’t overmix — we’re aiming for smooth, not frothy.
5. Get That Red Velvet Glow
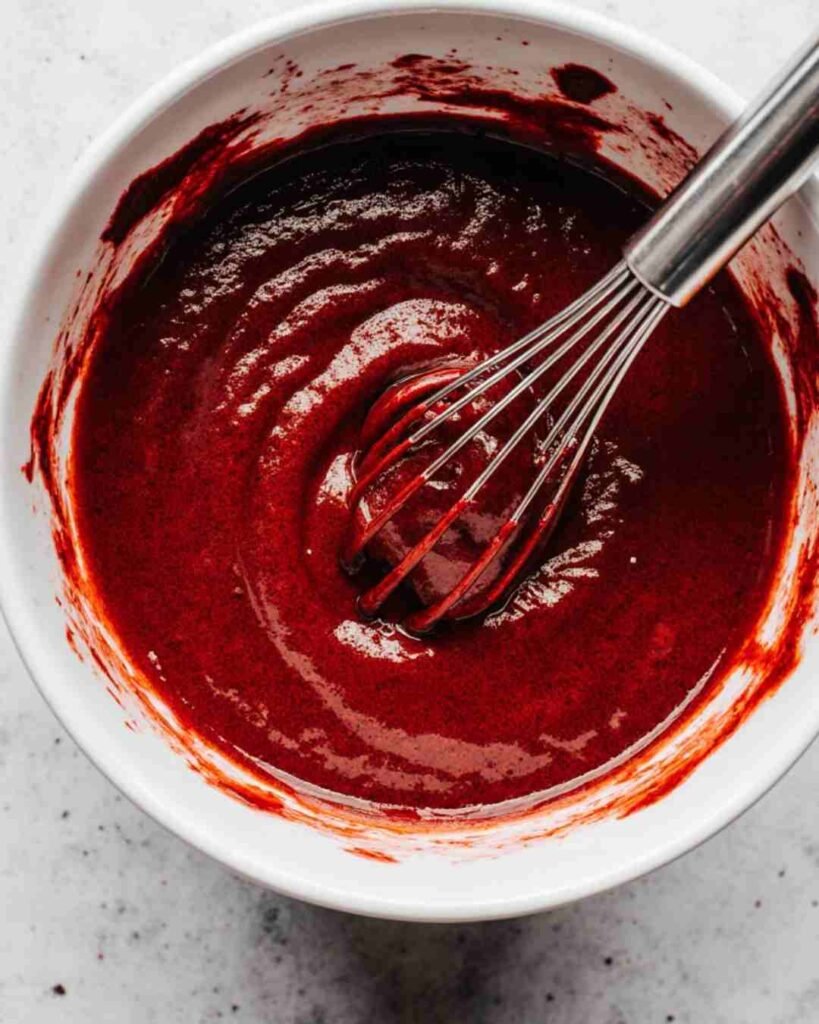
Add cocoa powder and red food coloring. Start with a little and add more until you hit that gorgeous deep red. (Somewhere between “romantic rose” and “Valentine’s Day explosion.”)
Mix until even. This is the moment you realize you’re an artist.
6. Egg Time
Add eggs one at a time, mixing gently after each. Slow and steady wins the cheesecake race. Overmixing adds air, which causes cracks. We don’t want that kind of drama here.
7. Oreo Confetti Party
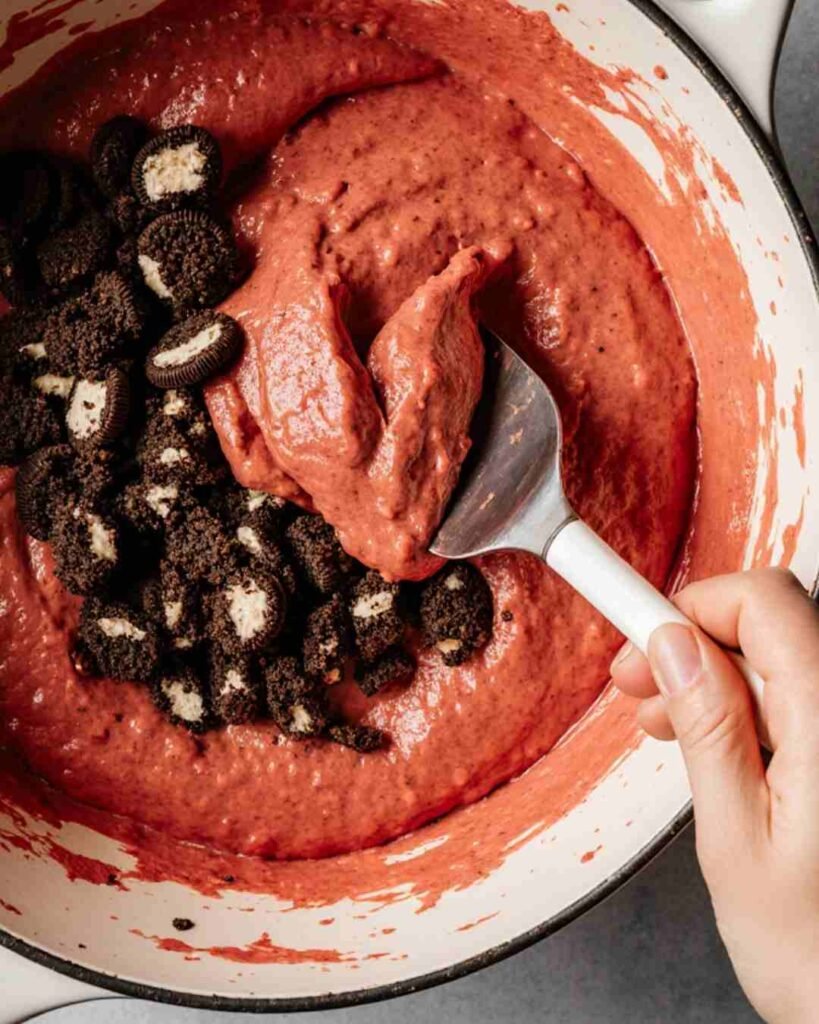
Fold in your crushed Oreos. Not too much — you want pretty little chunks throughout the cheesecake, not mud. Use a spatula and light hands, like you’re tucking them in for a cozy nap.
8. Pour and Pamper
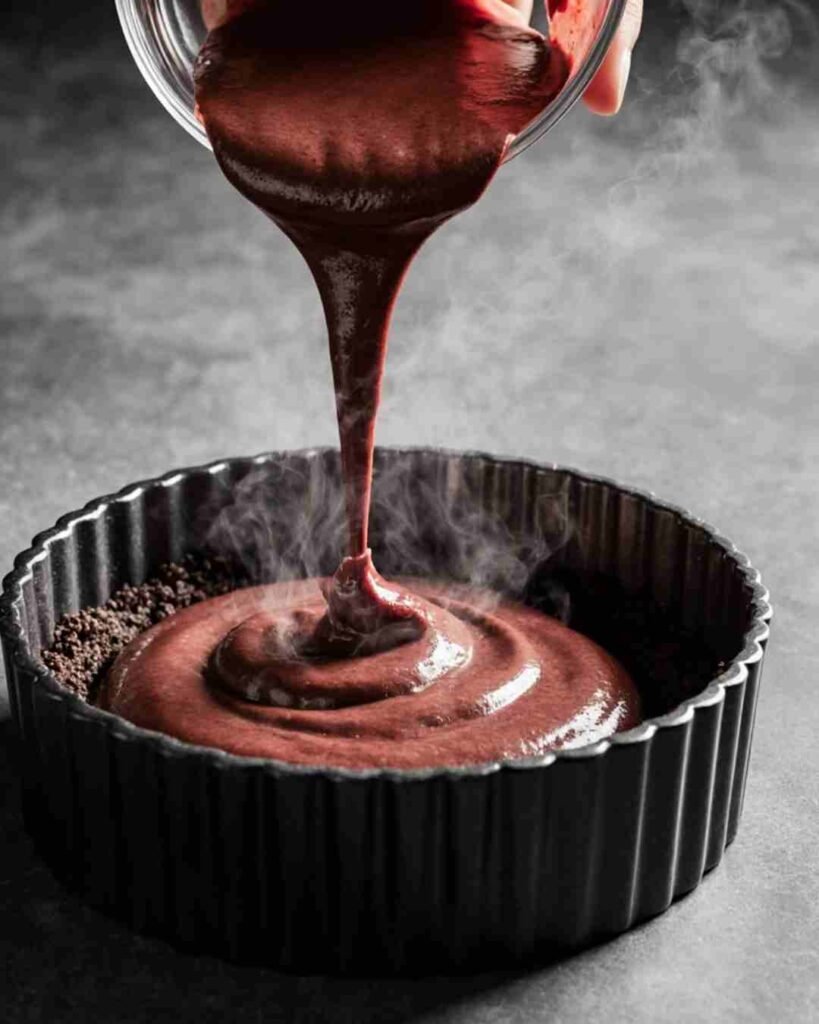
Pour your luscious red velvet batter into the cooled crust. Tap the pan a few times on the counter to pop any sneaky air bubbles.
Then, set your pan inside a larger roasting pan. Pour hot water around it until it reaches halfway up the sides. Congratulations, you’ve just made a cheesecake hot tub.
This step — the water bath — keeps your cheesecake creamy and crack-free. Don’t skip it.
Learn more about why a water bath is essential for baking creamy cheesecakes.
9. Bake to Perfection
Bake for 60–70 minutes. The edges should look set, but the center should jiggle slightly — think Jell-O dance party, not soup.
Once baked, turn off the oven and crack the door open. Let the cheesecake rest inside for an hour. Yes, we’re cooling slowly. Cheesecakes hate sudden change. (Same.)
10. Chill, Baby, Chill
Remove from the oven, let it cool fully at room temperature, then refrigerate for at least 4 hours — or overnight if you have the willpower. This is when it sets into that creamy, dreamy texture that’s worth the wait.
11. Dress It Up

Time to make it Insta-ready. Top with whipped cream swirls, Oreo crumbs, or a chocolate drizzle that would make a barista jealous. Want extra sparkle? Dust with cocoa powder.
Stand back. Admire. Whisper “I made that.” Take a picture. Then dig in.
Storage & Make-Ahead Tips
- Fridge: Keeps perfectly for up to 5 days, covered tightly.
- Freezer: Wrap slices (or the whole cake) in plastic wrap + foil, freeze up to 2 months. Thaw overnight in the fridge before serving.
- Make Ahead: Bake and chill a day before your event — it’s even better after resting overnight.
Pro tip: Don’t add whipped cream until you’re ready to serve. Otherwise, it’ll deflate faster than your motivation on a Monday.
Common Mistakes (and How to Avoid Them)
- Cold Cream Cheese? You’ll get lumps. Let it soften first.
- No Water Bath? Expect cracks. Unless you love that “volcanic cheesecake chic.”
- Overmixing the Eggs? Hello, bubbles. Goodbye, smooth texture.
- Rushing the Chill Time? Patience, my friend. A warm cheesecake is chaos in custard form.
- Overbaking? You’ll end up with dry cheesecake sadness. Pull it when the middle still wobbles.
Basically, treat your cheesecake like a houseplant — give it time, gentle care, and don’t overdo anything.
Alternatives & Swaps (Because Life Happens)
- No Oreos? Use chocolate graham crackers, Biscoff, or even digestive biscuits. (We don’t judge.)
- No Red Food Coloring? Beet juice or strawberry powder work if you’re going “natural and smug.”
- No Sour Cream? Plain Greek yogurt steps up nicely.
- Gluten-Free? Gluten-free Oreos are a thing now. You’re welcome.
- Want Mini Cheesecakes? Line a muffin tin with cupcake liners, add crust + batter, and bake 20–25 minutes. Adorable and perfectly portioned.
FAQ (Frequently Asked Questions)
Do I really need a water bath?
Yes. Unless you love fissures in your dessert. It keeps the texture silky smooth and even.
Can I skip the red food coloring?
Sure! You’ll have an Oreo cheesecake that tastes identical — just less flashy. Still fabulous.
How do I know when it’s done baking?
The edges should be set, the center should jiggle slightly, and your kitchen should smell like heaven.
Why did mine crack anyway?
Maybe your oven runs hot, or you cooled it too fast. But don’t stress — cover it with whipped cream and call it “artsy.”
Can I make it ahead for a party?
Absolutely. It actually tastes better the next day. Just chill it overnight and top before serving.
How long does it last?
Five days in the fridge, two months in the freezer. (Not that it’ll survive that long.)
Can I use store-bought crust?
You can, but homemade is way better. Store-bought crusts are like store-brand Oreos — fine, but not iconic.
More Decadent Dessert Recipes
- Easy Vanilla Pound Cake Recipe | Moist, Buttery & Foolproof— Simple, elegant, and buttery-soft. This classic loaf is perfect when you want something sweet without the fuss.
- Homemade Oatmeal Cream Pies – Soft, Chewy & Better Than Store-Bought!— A nostalgic favorite with fluffy marshmallow filling and golden oatmeal cookies that taste like childhood (but better).
- Cranberry Pistachio Shortbread Cookies (Easy Slice-and-Bake Recipe)— Buttery, festive, and packed with color and crunch. These cookies practically scream holiday cheer.
Final Thoughts
And there you have it — the ultimate Red Velvet Oreo Cheesecake that’ll make you the hero of every dessert table. It’s rich, creamy, a little extra, and absolutely worth every minute.
Seriously, once you make this, don’t be surprised when people start volunteering you to bring dessert every time. (You did this to yourself.)
So go ahead — whip out those Oreos, rock that red hue, and treat yourself to a slice (or three). You deserve it.
Pro tip: Make two. Future you will be very grateful.

🍰 Red Velvet Oreo Cheesecake Recipe
Ingredients
For the Oreo Crust
- 24 Oreo cookies (whole, cream included)
- 5 tablespoons unsalted butter, melted
For the Cheesecake Filling
- 3 packages (8 oz each) cream cheese, softened
- 1 cup granulated sugar
- ¾ cup sour cream
- ½ cup heavy cream
- 1 teaspoon vanilla extract
- 2 tablespoons unsweetened cocoa powder
- 1 tablespoon red food coloring (or more for deeper red)
- 3 large eggs, room temperature
- 10 crushed Oreos (for folding into the batter)
For the Topping (Optional but Fabulous)
- Whipped cream, for garnish
- Mini Oreos or crushed Oreos, for decoration
- Chocolate drizzle, optional but encouraged
Instructions
Set your oven to 325°F (160°C). Line the bottom of a 9-inch springform pan with parchment paper and wrap the outside in foil to prepare for a water bath.
Crush 24 Oreos in a food processor until fine crumbs form. Mix with melted butter until evenly coated. Press firmly into the bottom of the springform pan. Bake for 10 minutes, then set aside to cool.
In a large bowl, beat softened cream cheese until smooth. Add sugar and vanilla, mixing until creamy and fluffy.
Mix until smooth and glossy. Don’t overbeat — you want it silky, not airy.
Stir in cocoa and red food coloring until you reach that perfect rich red velvet shade.
Beat on low speed after each addition until just combined. Avoid overmixing to prevent cracks.
Gently fold in Oreo pieces — don’t stir too much or you’ll lose that pretty speckled look.
Pour the batter over the crust. Place your springform pan in a larger pan and fill with hot water halfway up the sides (water bath). Bake for 60–70 minutes, until the edges are set but the center jiggles slightly.
Turn off the oven, crack the door, and let the cheesecake rest for an hour. Then cool completely at room temperature before refrigerating for at least 4 hours (or overnight for best results).
Top with whipped cream, crushed Oreos, and chocolate drizzle. Slice, serve, and prepare for applause.
Notes
- Don’t skip the water bath! It prevents cracks and keeps your cheesecake creamy.
- Room temperature ingredients = success. Cold cream cheese causes lumps.
- Need it gluten-free? Use gluten-free Oreos. Works beautifully.
- Red food coloring tip: Gel gives a richer red than liquid.
- Serving idea: Drizzle each slice with chocolate sauce and top with an extra Oreo for that bakery look.
Nutrition Information:
Yield: 12 slicesAmount Per Serving: Calories: 485Total Fat: 32gSaturated Fat: 18gCarbohydrates: 40gFiber: 1gSugar: 29gProtein: 8g