

Santa Claus Macarons Recipe | Festive Christmas Cookies
Get ready to bake something so cute even Santa himself might blush! These Santa Claus Macarons combine the classic chewy texture of French macarons with the magic of Christmas — red hats, white beards, and sweet vanilla filling that tastes like holiday cheer.
If you’ve ever wanted a show-stopping Christmas treat that’s Instagram-ready, totally giftable, and ridiculously fun to make, this is it. Let’s dive into this holiday baking adventure together!
Why You’ll Love This Recipe
Here’s why these Santa Claus Macarons deserve a spot in your Christmas lineup:
- They’re festive and fun. Each cookie looks like a tiny Santa — perfect for gifting or dessert platters.
- The texture is divine. Crisp on the outside, chewy in the middle, and filled with silky buttercream.
- They’re make-ahead friendly. The shells can be prepared days before you assemble them.
- Totally customizable. You can switch up colors, fillings, and designs for elves, snowmen, or even Grinch macarons.
- Pinterest gold! Their bright red hats and creamy white details make them scroll-stopping on any feed.
Making macarons can sound intimidating, but don’t worry — this guide is all about real-life baking, not pastry-school perfection.
Santa’s Cookie Bars for chewy cookie squares or Christmas Rice Krispie Treats for a fun, no-bake option.
Ingredients You’ll Need
We’ll break this down so your grocery run is stress-free (and Santa-approved).
For the Macaron Shells:
- 1 cup almond flour – Finely ground for smooth shells. No chunky bits, please.
- 1 ¾ cups powdered sugar – Adds sweetness and that signature smooth texture.
- 3 large egg whites (room temperature) – Whip best when they’re not chilly.
- ¼ cup granulated sugar – Helps create glossy, stable meringue.
- Red gel food coloring – For Santa’s hat. Use gel, not liquid, so the batter stays thick.
- White gel food coloring (optional) – For beard or hat details.
For the Vanilla Buttercream Filling:
- ½ cup unsalted butter, softened – Because butter makes everything better.
- 1 ½ cups powdered sugar – Sweet and fluffy.
- 2 tablespoons heavy cream – Adds creaminess and smoothness.
- 1 teaspoon vanilla extract – That cozy, Christmas flavor.
For Decoration:
- Mini marshmallows or white chocolate pearls – Santa’s beard and hat trim.
- Black edible gel or melted dark chocolate – For eyes and buttons.
- Piping bags – One for macaron batter, one for buttercream, one for decorations.
Pro Tip: Always use a kitchen scale for macarons — even tiny measuring differences can affect the result.
Step-by-Step Instructions
1 Prep Your Baking Zone
Grab a clean, dry bowl (no grease!) and line baking sheets with parchment paper or silicone mats. Have your piping bag ready with a round tip.
Clean bowls make better meringue — even a drop of oil ruins it.
2 Sift the Dry Ingredients
Combine almond flour and powdered sugar, then sift together twice.
Yes, twice. It feels extra, but that’s how you get those smooth, professional-looking shells.
3 Whip Up the Meringue
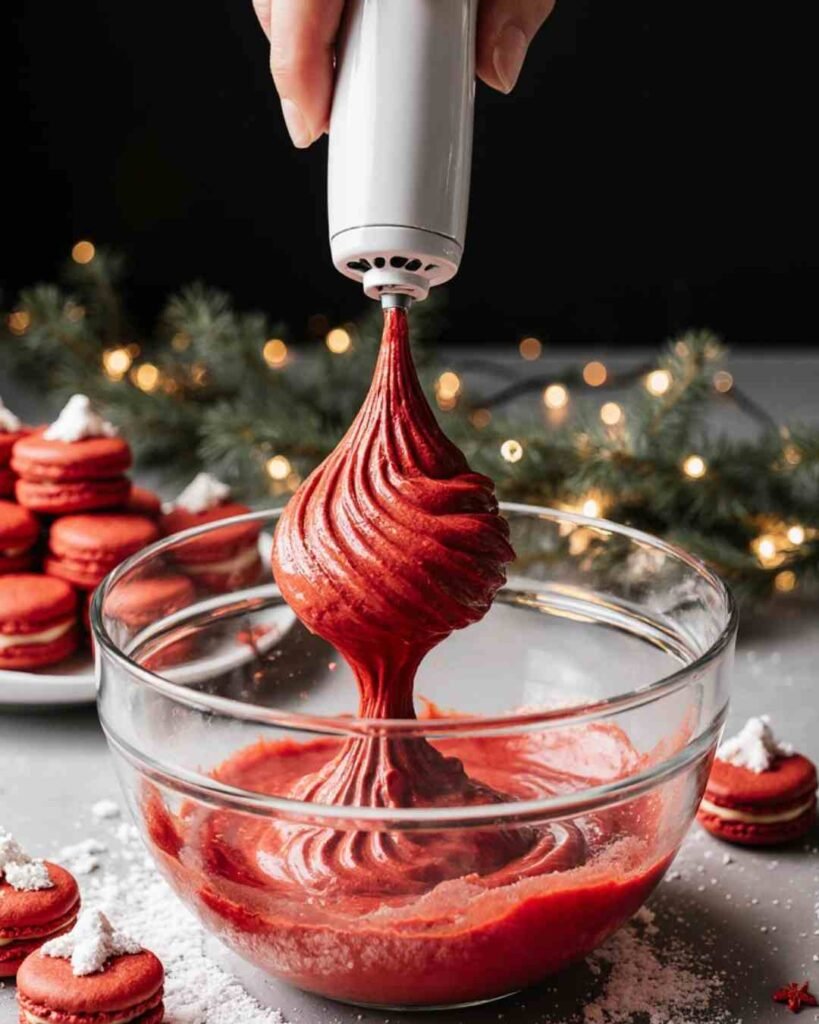
In a clean bowl, beat egg whites until foamy. Slowly add granulated sugar, a spoonful at a time, while whipping on medium speed.
Keep going until stiff, glossy peaks form — when you lift your whisk, the peaks should stand tall and shiny.
Add your red food coloring and gently fold it in. Think “Santa suit red,” not “pink elf pajama.”
4 Fold Like a Macaron Pro
Add the dry ingredients into the meringue in two parts.
Use a spatula to gently fold (not stir) in circular motions, pressing the batter against the bowl to deflate some air.
You’re aiming for that “lava flow” texture — the batter should ribbon smoothly off the spatula and disappear after about 10 seconds.
Over-mixing = flat macarons. Under-mixing = cracked macarons. Find the sweet spot.
5 Pipe the Batter
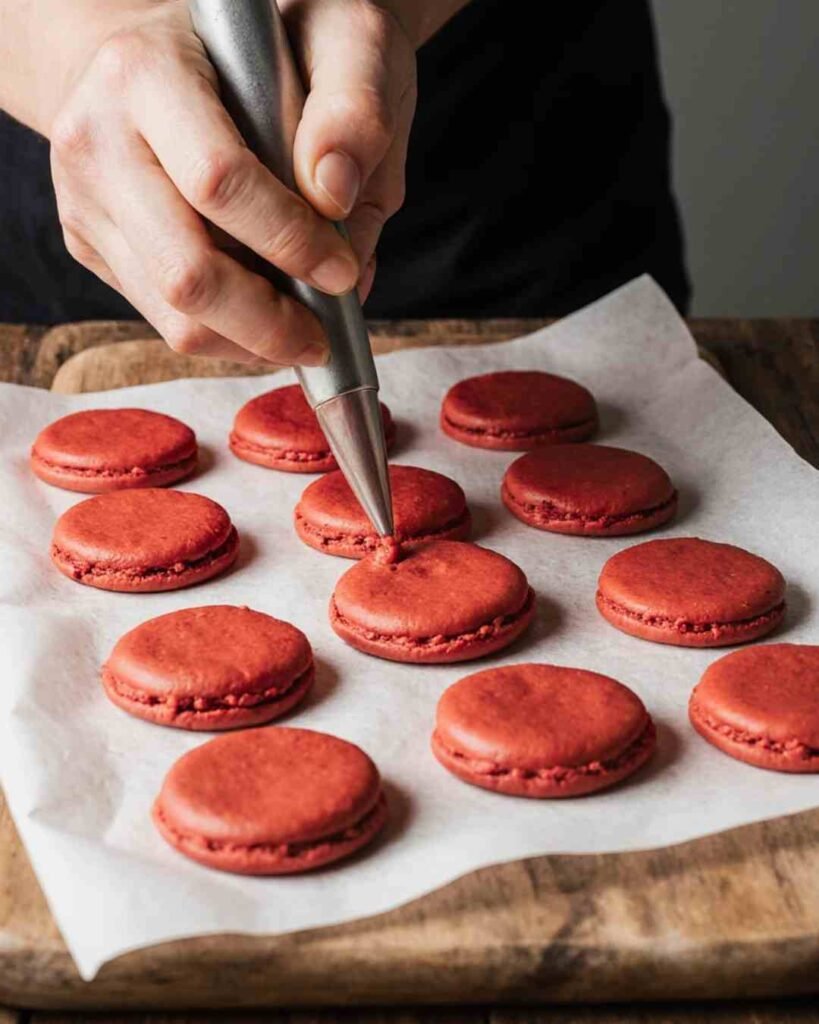
Transfer your batter to a piping bag and pipe 1.5-inch circles onto your prepared tray.
Tap the tray firmly on the counter 3–4 times to pop any air bubbles.
Pro tip: Use a printed macaron template under the parchment to keep sizes even (then slide it out before baking).
6 Rest the Shells
Let them rest at room temperature for 30–60 minutes, until the tops feel dry when lightly touched.
This drying step forms that signature macaron “foot.” Skip it and you’ll get sad, footless Santas.
7 Bake Like a Boss
Preheat your oven to 300°F (150°C).
Bake for 15–18 minutes, rotating halfway through for even cooking.
They’re ready when the tops are firm and don’t wobble.
Let them cool completely before lifting them off the parchment — patience now saves tears later.
8 Make the Buttercream
In a bowl, beat butter until creamy. Add powdered sugar, vanilla, and heavy cream.
Beat until light and fluffy — the texture should resemble whipped clouds (or Santa’s beard).
If it’s too thick, add a teaspoon more cream.
9 Assemble the Santa Claus Macarons
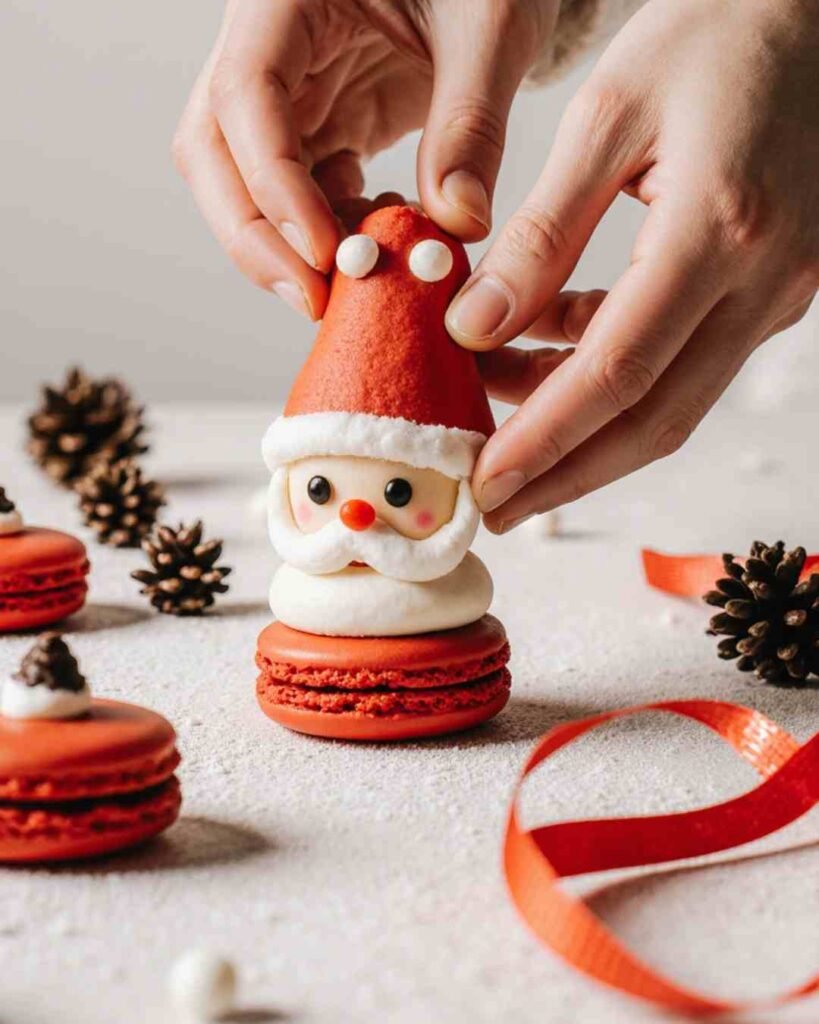
Pair up similar-sized shells.
Pipe a small swirl of buttercream on one half, then gently sandwich with the other.
Now the fun part: decorating!
- Pipe white dots for the hat trim.
- Stick on mini marshmallows for the beard.
- Add tiny chocolate dots for eyes.
- Optional: A dab of white icing for Santa’s pom-pom hat tip.
Let them rest in the fridge for a few hours before serving — this allows flavors to meld perfectly.
Decoration & Finishing Touches
Want those macarons to scream “Christmas!”? Here’s how:
- Add shimmer: Brush on edible gold dust or pearl luster for magical sparkle.
- Gift-wrap: Place each macaron in mini cupcake liners inside clear boxes — instant DIY holiday gift.
- Color mix: Make a few green ones for elves or white for snowmen to add variety to your dessert spread.
- Santa’s secret: A drop of peppermint extract in the filling makes them smell like Christmas morning.
For another charming edible gift idea, see Christmas Rice Krispie Treats.
Tips, Tricks & Substitutions
- Measure precisely. A kitchen scale is your best friend.
- Humidity hurts. Avoid baking macarons on rainy days — moisture ruins the shells.
- No almond flour? Try hazelnut or pistachio flour. They add a lovely twist!
- Flavor variations:
- Peppermint for festive zing.
- Chocolate ganache for a rich surprise.
- Strawberry jam for a fruity burst.
- Color choices: Make half red and half white to create a Santa hat vs. beard contrast.
Quick fix: Cracked shells? Sandwich them anyway. Once you decorate, nobody notices.
Common Mistakes to Avoid
Let’s keep your holiday baking stress-free:
- Over-mixing the batter: Makes the cookies flat and hollow.
- Skipping resting time: Leads to cracked shells.
- Underbaking: Sticky centers that cling to parchment paper — heartbreaking!
- Using liquid food coloring: Adds too much moisture; stick to gel.
- Decorating while hot: Melted Santa faces are tragic. Cool first, decorate later.
- Ignoring temperature: Every oven differs; test one cookie first to find your sweet spot.
Need more beginner-friendly guidance? Check out our easy Crockpot Turkey and Rice Soup — simple, cozy, and forgiving for first-timers!
Storage & Make-Ahead Tips
Macarons actually taste better the next day! Here’s how to handle leftovers or prep ahead:
- Store assembled macarons in an airtight container in the fridge for up to 5 days.
- Freeze shells (unfilled) for up to 1 month. Just defrost before filling.
- Avoid humidity: Keep them in a cool, dry place. Moisture ruins their delicate texture.
- Serve chilled: Let macarons sit at room temp for 15 minutes before eating — it brings out the best flavor.
Perfect for baking a week before Christmas and serving stress-free on the big day!
Frequently Asked Questions
Q: Can I make Santa macarons without almond flour?
You can use finely ground pistachios or hazelnuts — but expect a different flavor. Still delicious though!
Q: Do I have to age egg whites?
Not necessarily. Fresh, room-temperature egg whites work fine. Aging can help with consistency, but it’s optional.
Q: Why did my macarons crack on top?
Most likely you didn’t rest them long enough or your oven temperature was too high.
Q: Can I skip the food coloring?
Sure — but then you’ll have “Polar Bear Macarons” instead of Santa ones. Still cute!
Q: How long should I rest them before serving?
At least 4 hours, but overnight is best for perfect chewiness.
Q: Can I make these gluten-free?
They already are! Macarons use almond flour, so they’re naturally gluten-free.
Q: Can I use different fillings?
Absolutely. Ganache, caramel, jam, or cream cheese frosting — go wild! Santa loves creativity.
Need a little extra help mastering macaron basics? Check out Food Network’s French Macaron Guide — it’s packed with pro tips for perfect feet, texture, and color.
Final Thoughts
There you have it — a tray full of Santa Claus Macarons that’ll make everyone at your holiday table grin like kids on Christmas morning.
They’re cute, chewy, and full of Christmas magic. And even if your first batch looks a little “abstract,” remember — it’s all part of the fun. Each one tells its own story (and tastes amazing).
So put on your favorite Christmas playlist, grab your whisk, and get baking.
These macarons are festive joy in cookie form — and yes, Santa definitely approves!
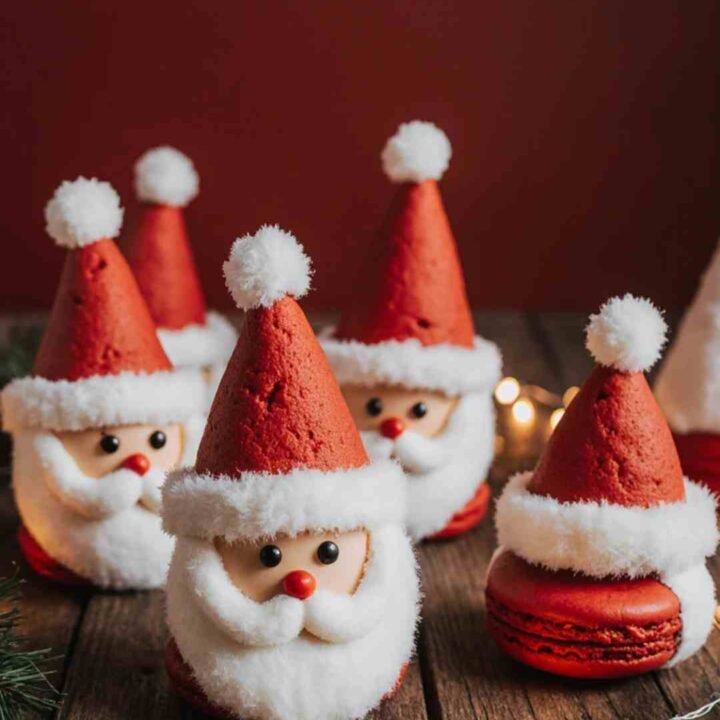
Santa Claus Macarons
Make your holiday extra magical with these adorable Santa Claus Macarons — crisp on the outside, chewy inside, and filled with creamy vanilla buttercream. These festive red-and-white cookies are perfect for Christmas parties, edible gifts, or cozy winter baking days.
Ingredients
For the Macaron Shells:
- 1 cup almond flour (finely ground)
- 1 ¾ cups powdered sugar
- 3 large egg whites (room temperature)
- ¼ cup granulated sugar
- Red gel food coloring (for Santa hats)
- White gel food coloring (optional, for beard details)
For the Vanilla Buttercream Filling:
- ½ cup unsalted butter (softened)
- 1 ½ cups powdered sugar
- 2 tablespoons heavy cream
- 1 teaspoon vanilla extract
For Decoration:
- Mini marshmallows or white chocolate pearls (for the beard and hat trim)
- Black edible gel or melted dark chocolate (for Santa’s eyes)
Instructions
- Prep the pans. Line baking sheets with parchment paper or silicone mats. Set aside.
- Sift the dry mix. Combine almond flour and powdered sugar. Sift together twice for smooth shells.
- Whip the meringue. Beat egg whites until foamy. Gradually add granulated sugar and continue whisking until stiff, glossy peaks form.
- Color the batter. Add red gel food coloring and gently mix until fully combined.
- Fold the mixture. Gently fold dry ingredients into the meringue until the batter flows like lava and forms ribbons that fade in 10 seconds.
- Pipe the shells. Transfer batter to a piping bag and pipe 1.5-inch circles onto prepared trays. Tap trays 3–4 times to release air bubbles.
- Rest the shells. Let them sit for 30–60 minutes, or until tops feel dry to the touch.
- Bake. Preheat oven to 300°F (150°C). Bake for 15–18 minutes, rotating halfway through. Cool completely before removing from parchment.
- Make the buttercream. Beat butter until creamy. Add powdered sugar, vanilla, and cream. Whip until light and fluffy.
- Assemble the macarons. Pipe buttercream onto one shell, top with another.
- Decorate. Use mini marshmallows for the beard and hat trim, and chocolate gel for eyes.
- Rest and serve. Chill for a few hours to allow flavors to develop before serving.
Notes
Nutrition Information:
Yield: 12Amount Per Serving: Calories: 145Total Fat: 8gCarbohydrates: 17gFiber: 1gSugar: 15gProtein: 2g