
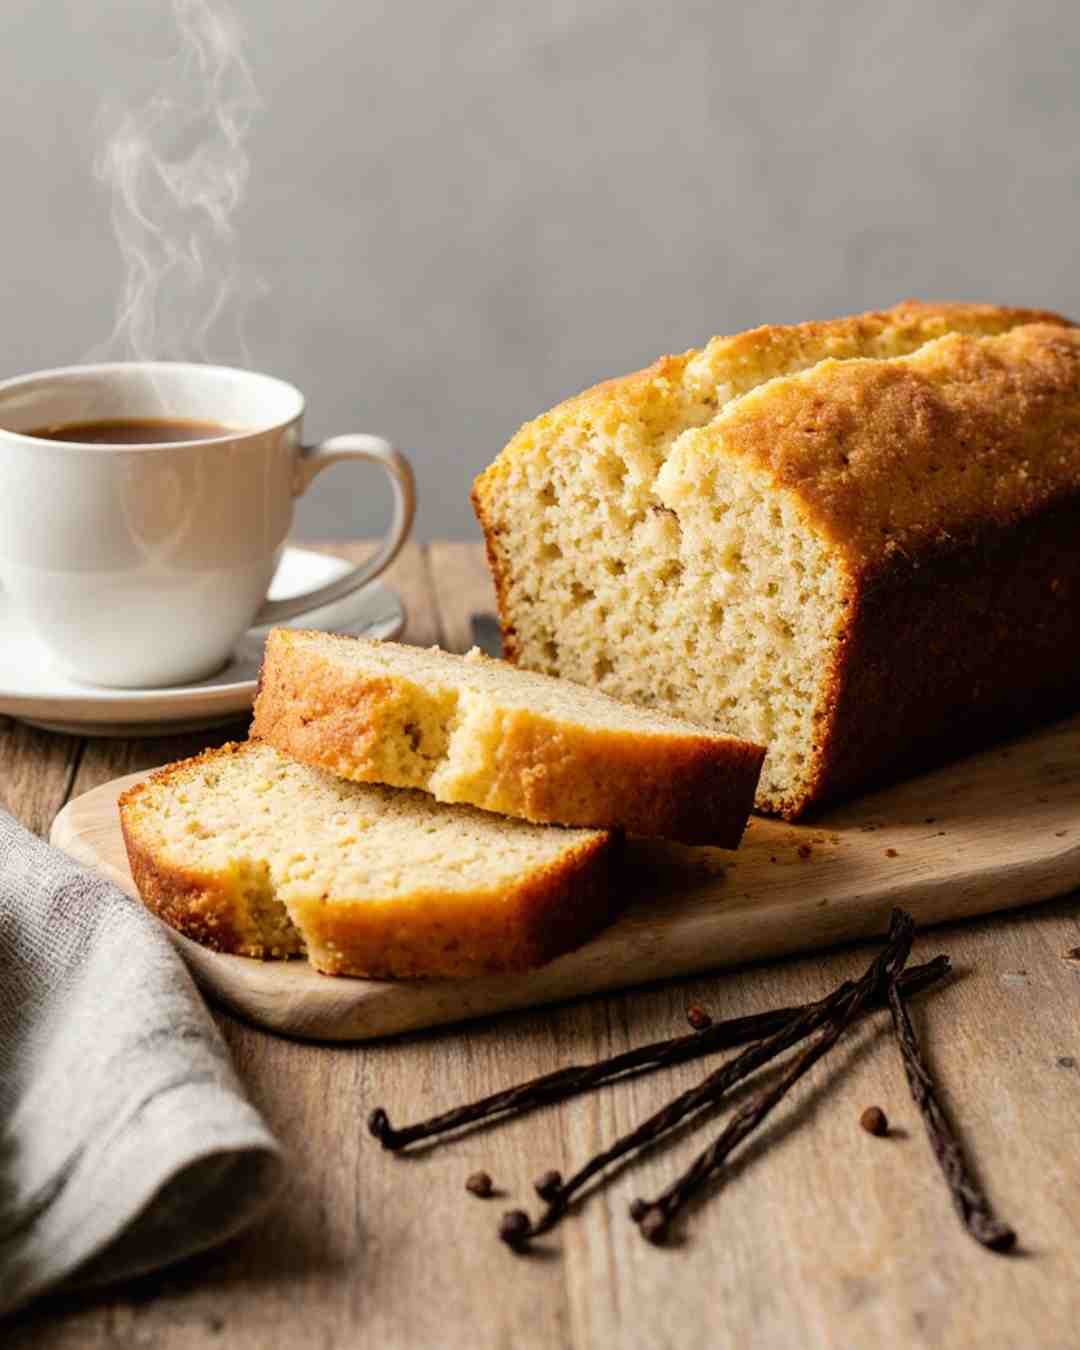
Easy Vanilla Pound Cake Recipe | Moist, Buttery & Foolproof
Easy Vanilla Pound Cake Recipe — four words that already smell like heaven. This isn’t just any cake; it’s the buttery, golden, no-fail dessert that turns ordinary afternoons into cozy celebrations. One bite and you’ll wonder why you ever bought cake mix from a box.
This recipe is ridiculously simple: no fussy steps, no weird ingredients, just pure vanilla perfection baked into every slice. It’s your go-to treat for Sunday brunch, birthdays, or late-night cravings when your sweet tooth refuses to chill.
Why You’ll Love This Easy Vanilla Pound Cake Recipe
This cake is the baking equivalent of a cozy blanket and a good playlist. But let’s break down exactly why it deserves a permanent spot in your recipe rotation:
- The texture is unreal. Buttery, soft, and just dense enough to feel fancy without crossing into brick territory.
- It’s simple. You can whip it up with basic pantry staples — no need to raid the specialty aisle or buy a stand mixer that costs more than your rent.
- Smells like heaven. The aroma of butter and vanilla wafting through your kitchen? Instant serotonin.
- Customizable. Add citrus zest, drizzle a glaze, or throw in chocolate chips — this cake’s chill with anything.
- Stays fresh and actually improves overnight. This “make-ahead” quality is something we value in our Homemade Oatmeal Cream Pies recipe as well!
Basically, this pound cake’s the culinary equivalent of that effortlessly cool friend who looks good in every situation.
Ingredients for the Best Easy Vanilla Pound Cake Recipe
Here’s the good news: everything you need is probably sitting in your kitchen right now, waiting for its moment to shine.
Main Ingredients:
- 1 cup (230 g) unsalted butter, softened – let it sit out until spreadable; this is non-negotiable.
- 1 ½ cups (300 g) granulated sugar – yes, it’s a lot. You’ll thank me later.
- 4 large eggs, room temperature – cold eggs can ruin your batter’s smoothness; don’t do it.
- 2 cups (250 g) all-purpose flour – the basic hero ingredient.
- ½ teaspoon baking powder – just enough lift for the perfect crumb.
- ¼ teaspoon salt – makes every flavor pop.
- ½ cup (120 ml) whole milk – skip the skim. We’re making cake, not a diet plan.
- 2 teaspoons pure vanilla extract – use the real deal; imitation stuff tastes like regret.
Optional Add-Ins (for when you’re feeling extra):
- Zest of one lemon or orange – adds sunshine in flavor form.
- ½ teaspoon almond extract – that nostalgic bakery vibe.
- ½ cup sour cream – for ultra-moist texture.
- Chocolate chips, berries, or nuts – if you’re feeling rebellious.
Step-by-Step Instructions
Step 1: Preheat Like a Pro
Preheat your oven to 350°F (175°C). Don’t skip this — a cold oven is a surefire way to ruin your cake before you even start. Line a 9×5 inch loaf pan with parchment paper or grease it with butter and dust it lightly with flour. Think of this as “cake armor.”
Pro tip: If you forget to preheat, don’t rush it. Wait until it’s fully ready. Patience is key, grasshopper.
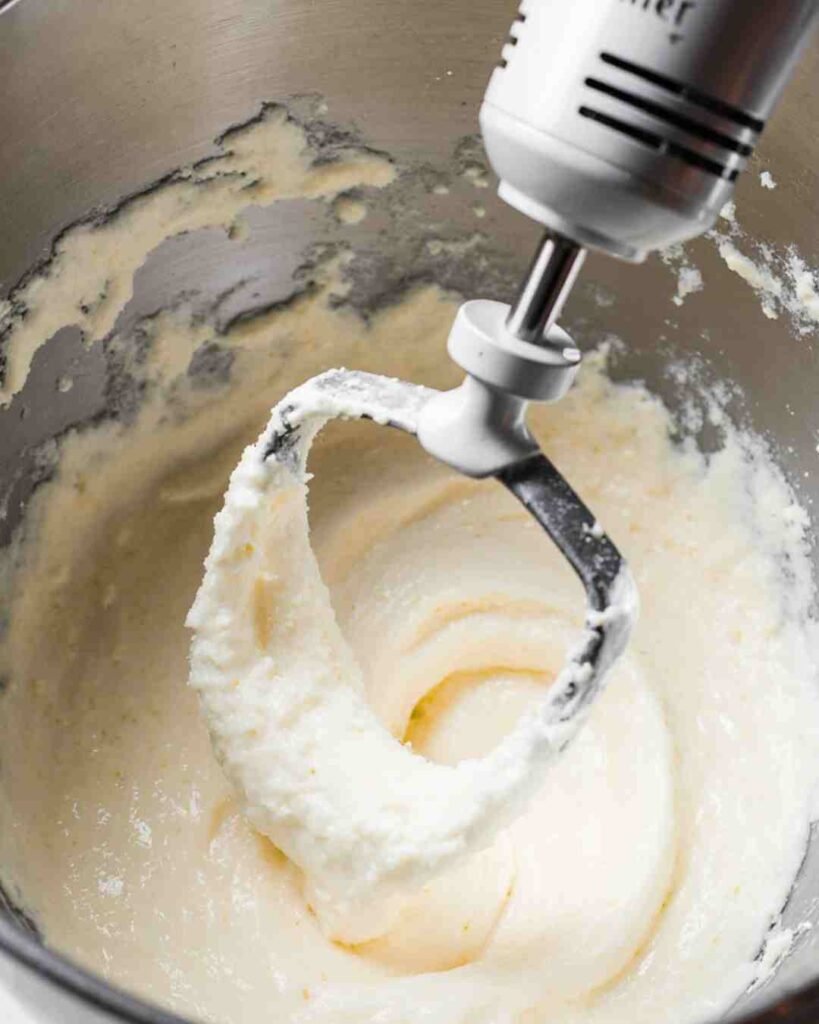
Step 2: Cream the Butter and Sugar
Beat the butter and sugar together for 3–5 minutes until it’s pale, fluffy, and looks like it’s been through a spa day. Creaming is a mechanical leavening process where the sugar crystals cut into the softened butter, trapping air pockets that expand in the oven.
Optional arm workout: Do it by hand with a whisk if you want to feel virtuous. Otherwise, let your mixer handle the labor while you sip coffee and feel smug.
Step 3: Add Eggs, One at a Time
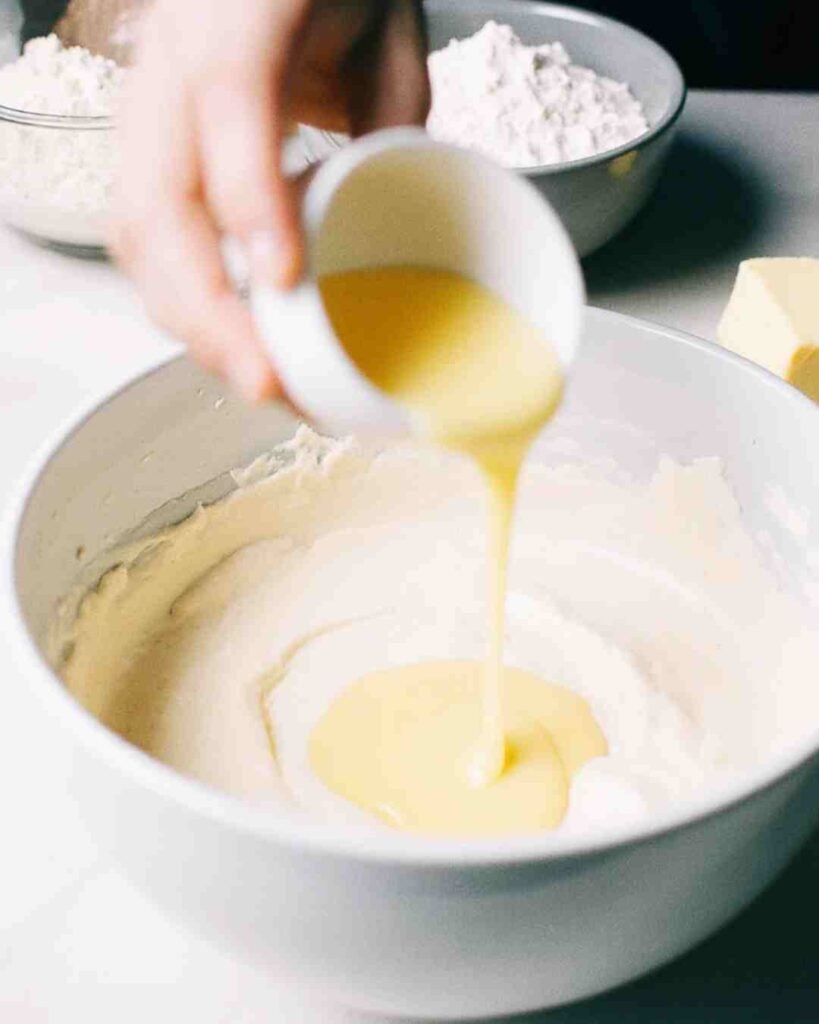
Crack in one egg, mix until it disappears, then add the next. Repeat until all four are in.
Why one at a time? Because dumping them in all at once is how you end up with a curdled, streaky mess that even your dog will side-eye.
Once all the eggs are in, the batter should be smooth, glossy, and smell like buttery heaven.
Step 4: Pour in the Vanilla
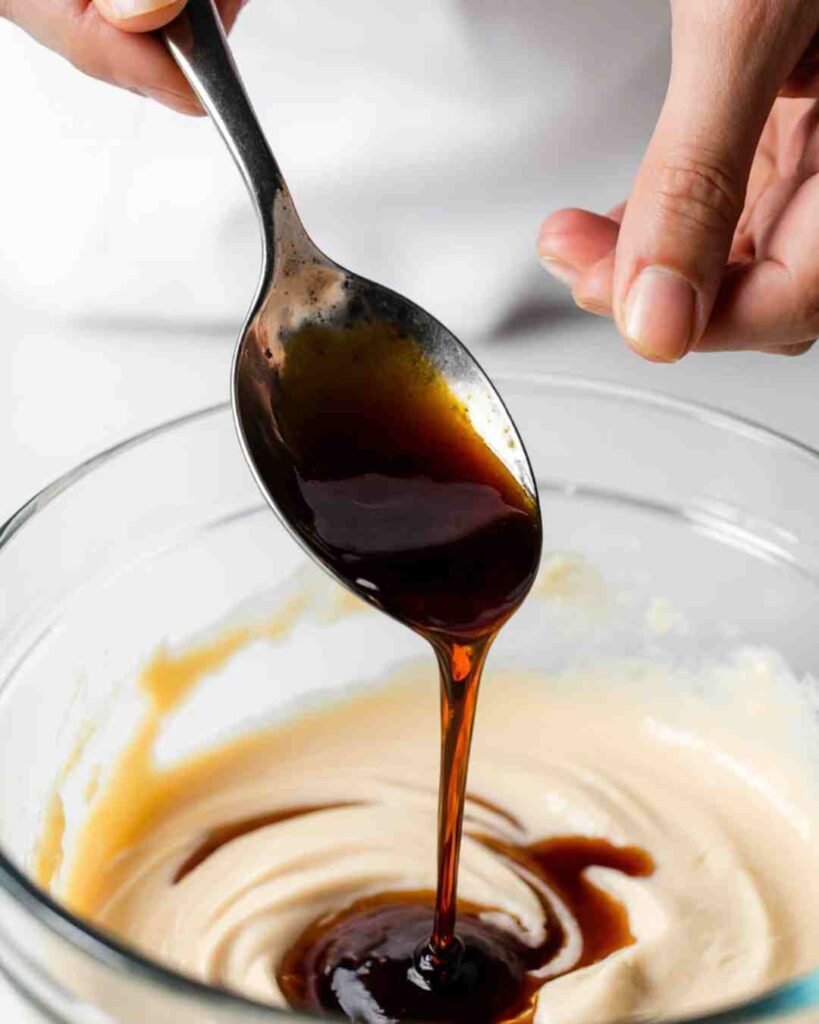
Add your 2 teaspoons of vanilla extract — the good stuff — and beat for another 30 seconds.
If you’re using almond extract or citrus zest, toss it in now too. This is where your kitchen officially transforms into a bakery.
Step 5: Combine Your Dry Ingredients
In a separate bowl, whisk together flour, baking powder, and salt. This ensures your cake rises evenly and doesn’t have surprise baking powder lumps (gross).
Pretend you’re a TV chef while whisking — bonus points if you narrate it dramatically.
Step 6: Mix Dry and Wet Ingredients (Like a Pro Negotiator)
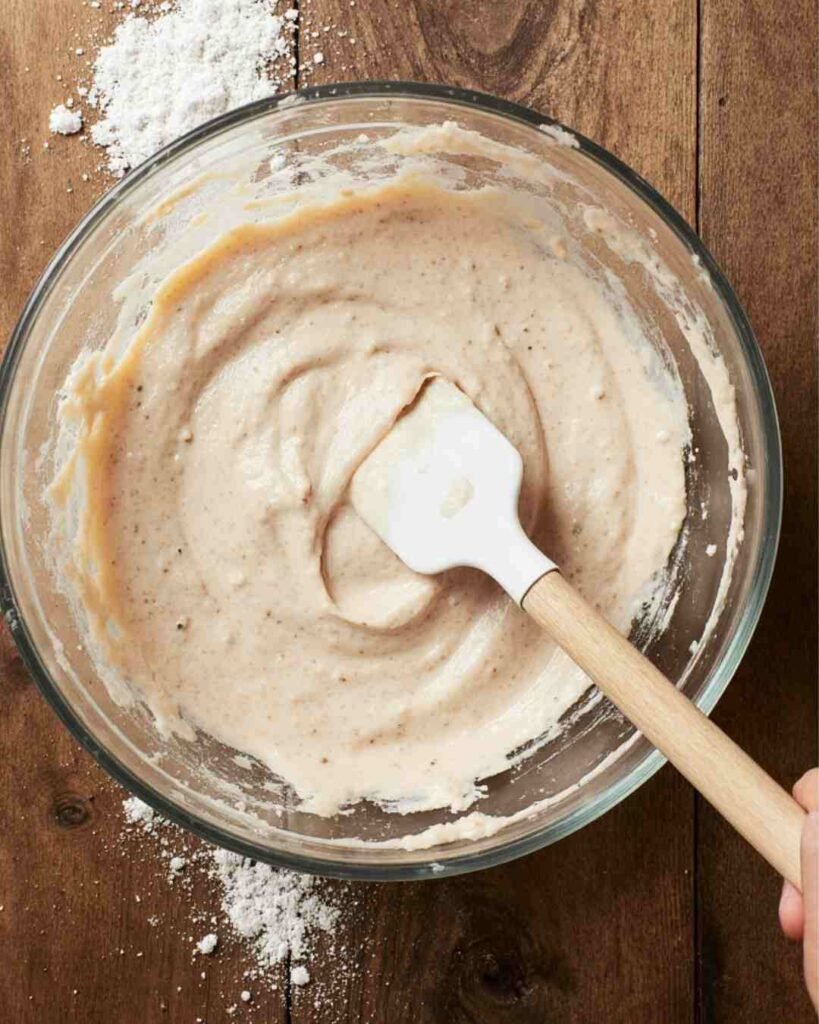
Add half the dry ingredients to your wet mixture, beat gently until combined, then add half the milk. Repeat with the remaining half of both.
Golden rule: Mix until just combined — not a second longer. Overmixing builds gluten, which is amazing for bread… but disastrous for tender cakes.
Your batter should be smooth, silky, and irresistible. Try not to “taste test” too much — raw eggs, remember?
Step 7: Pour and Smooth
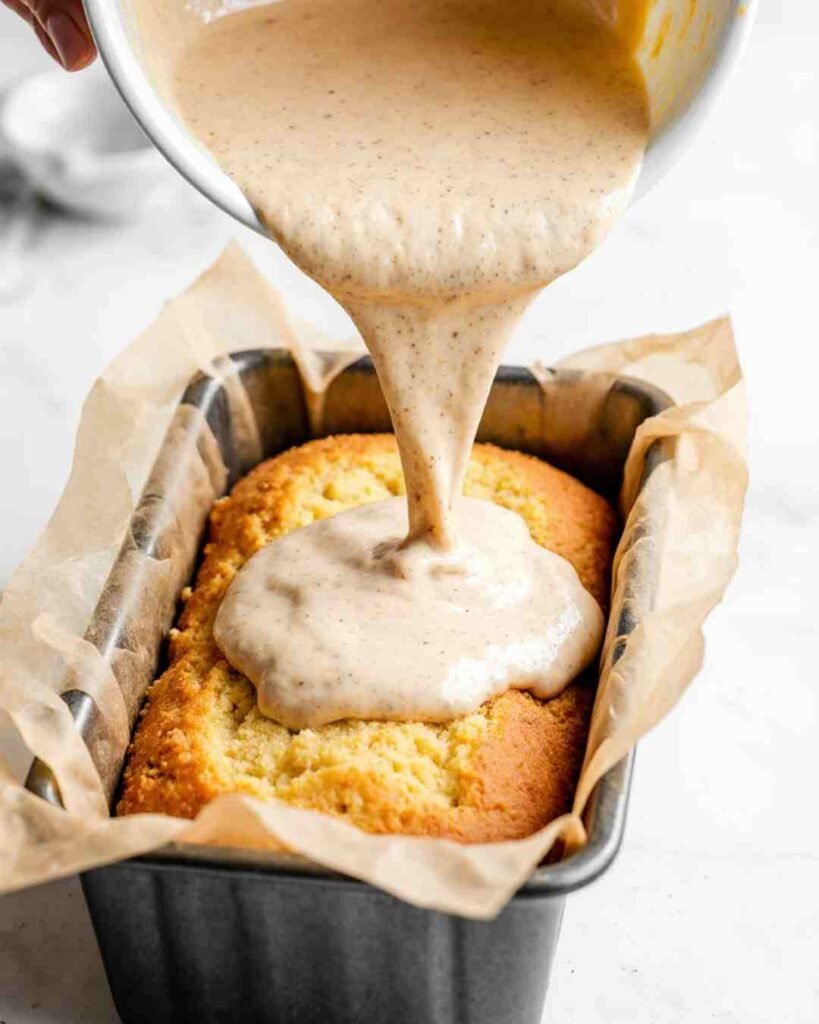
Pour the batter into your prepared pan and smooth the top with a spatula. This ensures it bakes evenly and looks Insta-worthy when sliced.
If you’re feeling fancy, drag a knife lightly through the center to encourage a pretty crack on top (yes, it’s a thing).
Step 8: Bake and Don’t Peek
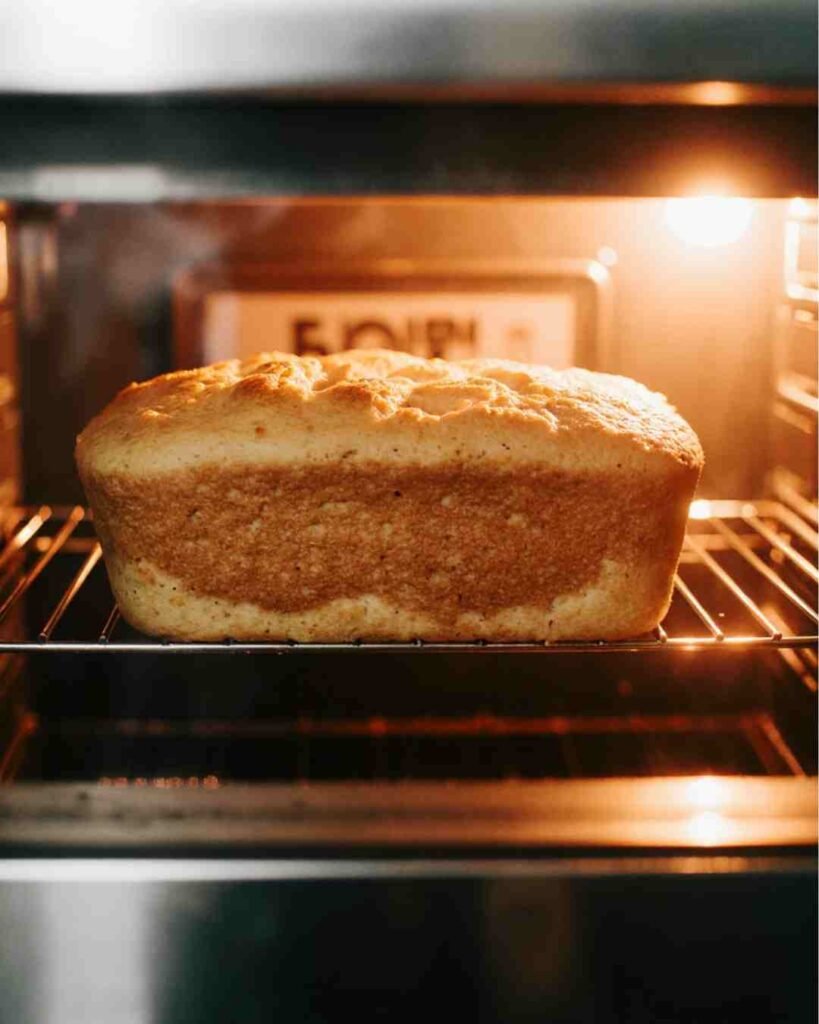
Bake for 50–60 minutes. Start checking at the 50-minute mark. For perfect doneness and texture, pound cake should reach an internal temperature of 210∘F (99∘C) in the center.
Important: Do not open the oven door constantly to check. Every peek drops the temperature and makes your cake sad.
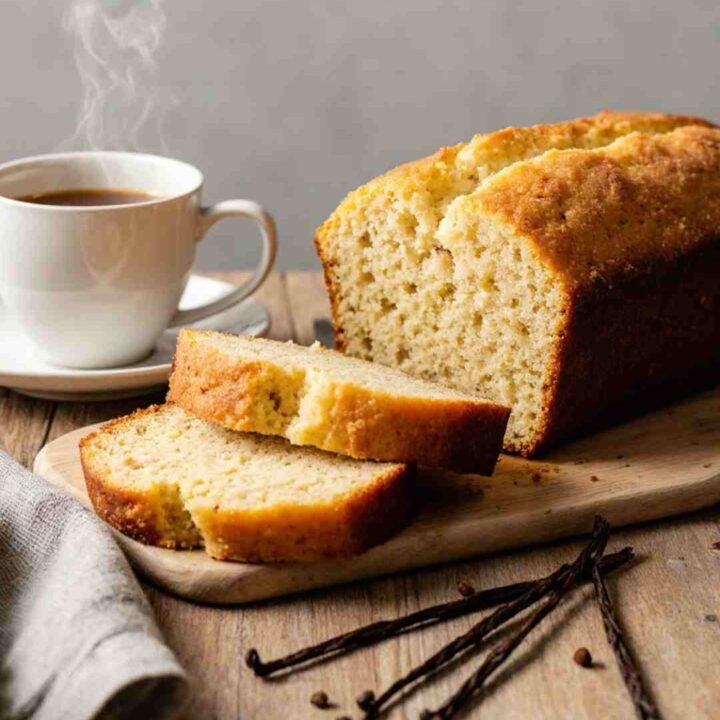
Step 9: Cool Before Slicing

Resist every urge to attack the cake immediately. Let it rest in the pan for 10–15 minutes, then carefully lift it onto a wire rack to cool completely.
If you slice it too soon, it’ll crumble like your willpower in front of a dessert menu. Once it’s cooled, slice thick or thin — dealer’s choice.
Tips & Tricks for Success
- Room temperature everything. Butter, eggs, milk — it’s not negotiable. They blend like a dream and make the texture divine.
- Measure flour correctly. Spoon it into your cup and level off with a knife. Scooping packs it down and makes your cake dense.
- Don’t overmix. As soon as that flour disappears, hands off.
- Tent with foil if needed. If your top’s browning too quickly, cover it loosely in the last 10 minutes.
- Slice with a serrated knife. It gives those perfect clean edges for your Pinterest photo op.
Common Mistakes to Avoid
Let’s save you some tears (and wasted butter):
- Skipping the preheat. Thinking the oven will “catch up”? It won’t. Your cake will rise like a lopsided volcano.
- Cold ingredients. Mixing cold butter with eggs straight from the fridge? That’s chaos, not cake.
- Overbaking. This isn’t a turkey. If your cake’s dark brown and crunchy, you’ve gone too far.
- Opening the oven too soon. Your cake will collapse faster than your motivation after work.
- Forgetting to grease the pan. You’ll end up chiseling your cake out like an archaeologist.
Flavor Variations & Substitutions
Want to put your own spin on it? Go for it — this cake’s a total team player.
- Dairy-free: Swap milk for almond, oat, or coconut milk.
- Gluten-free: Use a 1:1 gluten-free flour blend (Bob’s Red Mill or King Arthur are solid picks).
- Sugar swaps: Coconut sugar or monk fruit work, but they’ll change the flavor slightly.
- Add-ins: Fold in blueberries, chocolate chips, or a handful of chopped pecans.
- Citrus vibes: Add lemon or orange zest, then drizzle with a simple glaze made of powdered sugar and citrus juice.
- Moisture boost: Replace half the milk with sour cream or yogurt — it adds a luscious tang and keeps the crumb soft for days.
This cake’s base is like a blank canvas — go wild with your flavor artistry.
Serving, Storing & Make-Ahead
Serving Ideas:
- Dust with powdered sugar for an elegant “I-didn’t-try-that-hard” look.
- Serve warm with fresh berries and whipped cream.
- Add a scoop of vanilla ice cream if you believe in joy.
- Turn leftovers into a fancy trifle or cube it for dessert parfaits.
Storing:
- Store tightly wrapped at room temp for up to 4 days.
- In the fridge, it lasts 5–6 days.
- Want to freeze it? Wrap in plastic + foil, and it’ll stay good for 2 months. Thaw overnight before serving.
Pro tip: Toast a slice in the morning and slather it with butter. Instant breakfast upgrade.
FAQ (Frequently Asked Questions)
Q1: Can I use self-rising flour?
Yes, just skip the baking powder and salt. It’s the shortcut version.
Q2: What if I don’t have a loaf pan?
Use a bundt pan, round cake pan, or even muffin tins. Just adjust baking time — smaller pans cook faster.
Q3: Why did my cake sink in the middle?
Usually because it wasn’t baked long enough or you opened the oven too soon. Don’t panic — it’ll still taste amazing.
Q4: Can I make this ahead?
Absolutely! It keeps beautifully, and the flavor deepens overnight. Bake today, serve tomorrow — people will think you’re a genius.
Q5: Can I frost it?
You can, but it doesn’t need it. Still, a simple vanilla glaze or whipped cream never hurt anybody.
Q6: What’s the best way to know it’s done?
Toothpick test + golden color + edges pulling slightly away from the pan = perfection.
Q7: Can I make it vegan?
You can try replacing eggs with flax eggs or applesauce, but the texture changes a bit. It’ll still be tasty — just different.
More Cozy Recipes & Baking Resources
- Homemade Oatmeal Cream Pies recipe (Another incredible bake that gets better overnight)
- Breakfast Rolls recipe (Sweet & Savory) (Use that simple glaze technique on a different kind of bake)
- Best Buffalo Chicken Dip Recipe (Easy, Creamy & Cheesy Appetizer)
Final Thoughts
And that’s it — your new go-to Easy Vanilla Pound Cake that never disappoints. No stress, no special equipment, no weird instructions. Just pure, golden, buttery joy.
The best part? This cake feels fancy but comes together faster than most playlists. It’s perfect for Sunday brunch, potlucks, or those “I need dessert immediately” moments.
So go ahead — preheat that oven, blast some music, and bake something that makes you smile. Life’s too short for dry cake.
Now grab a fork (or don’t, no one’s judging) and dig in.
Easy Vanilla Pound Cake Recipe
Ingredients
- 1 cup (230 g) unsalted butter, softened
- 1 ½ cups (300 g) granulated sugar
- 4 large eggs, room temperature
- 2 cups (250 g) all-purpose flour
- ½ teaspoon baking powder
- ¼ teaspoon salt
- ½ cup (120 ml) whole milk
- 2 teaspoons pure vanilla extract (use high-quality vanilla for best flavor)
Optional Add-Ins (for variation):
- Zest of 1 lemon or orange
- ½ teaspoon almond extract
- ½ cup sour cream (swap for part of the milk for extra moisture)
- A handful of chocolate chips, berries, or nuts
Instructions
Notes
Nutrition Information:
Yield: 10–12 slicesAmount Per Serving: Calories: 340 kcalTotal Fat: 19gSaturated Fat: 11gCarbohydrates: 36gSugar: 22gProtein: 5g